
Face-on
Ball position.
Ball position changes where the club meets the ball along its arc. Find a repeatable starting point for the chosen club, then evaluate it through contact and flight.
By Dwain Kinghorn · Updated
Face-on · Club in frame · Address, Takeaway, Impact
Read ball position against the whole stance.
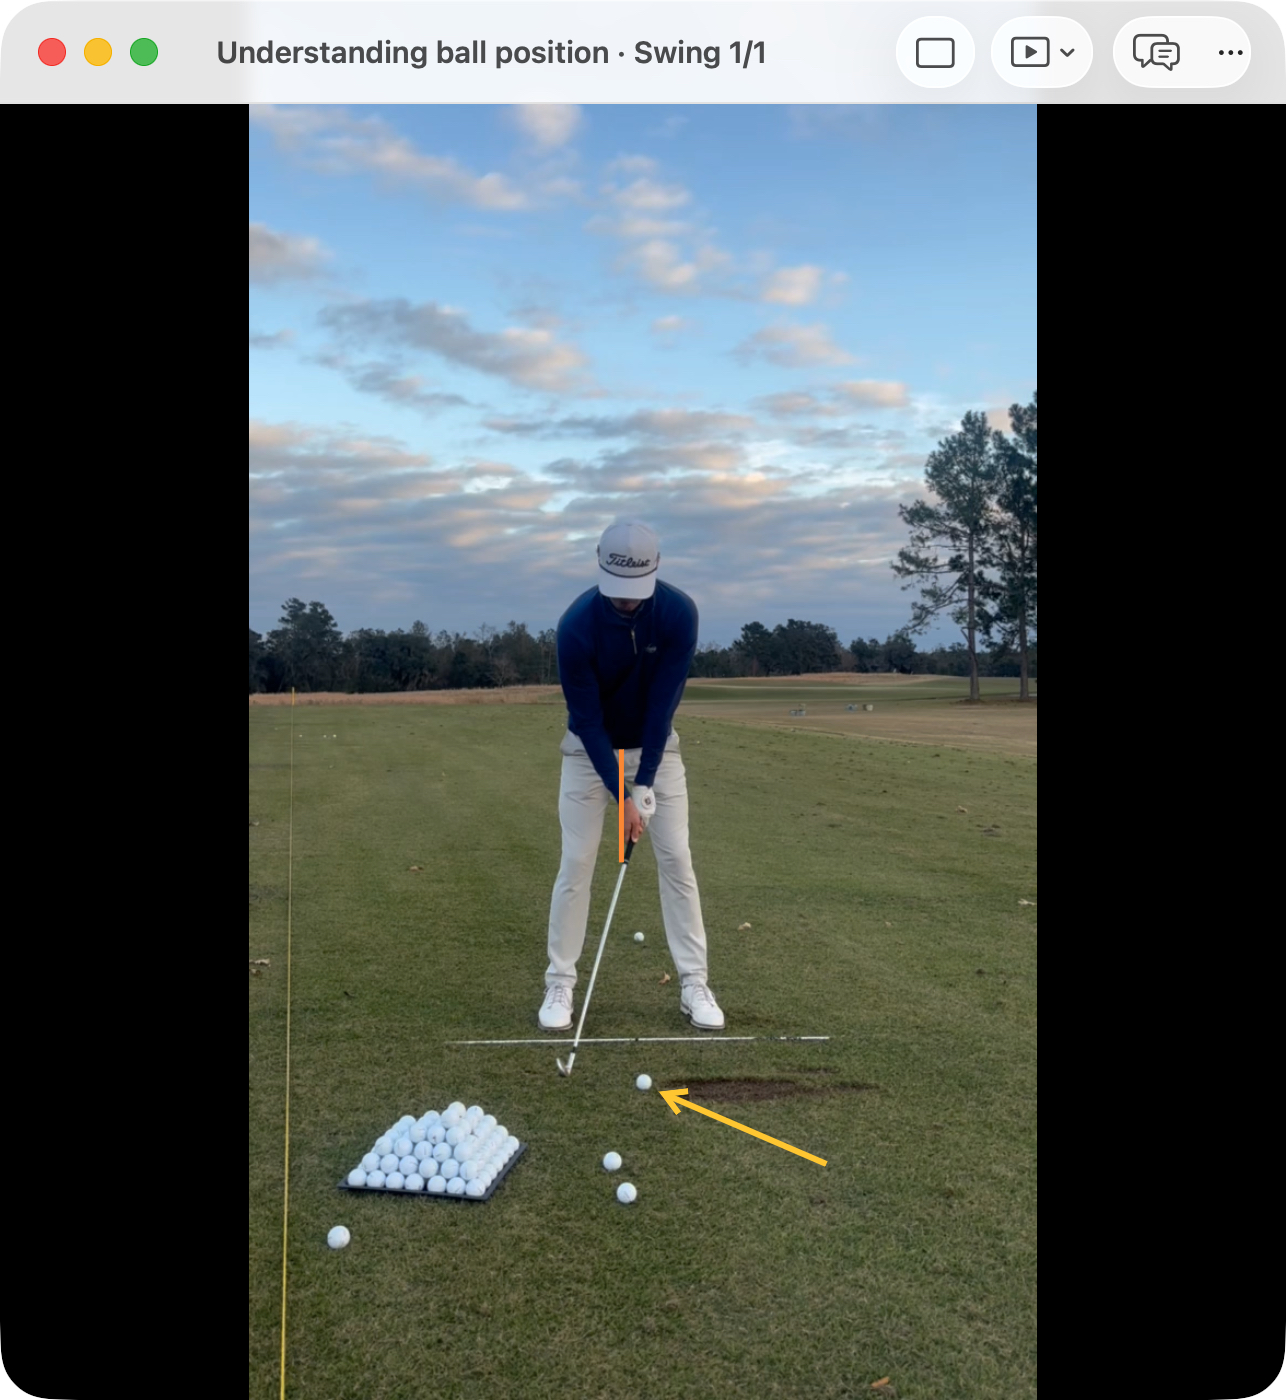
Locate the ball being played, then compare it with both feet. The yellow arrow picks out that ball; the orange hip reference gives additional body context. Ball position along the stance is different from distance away from the body.
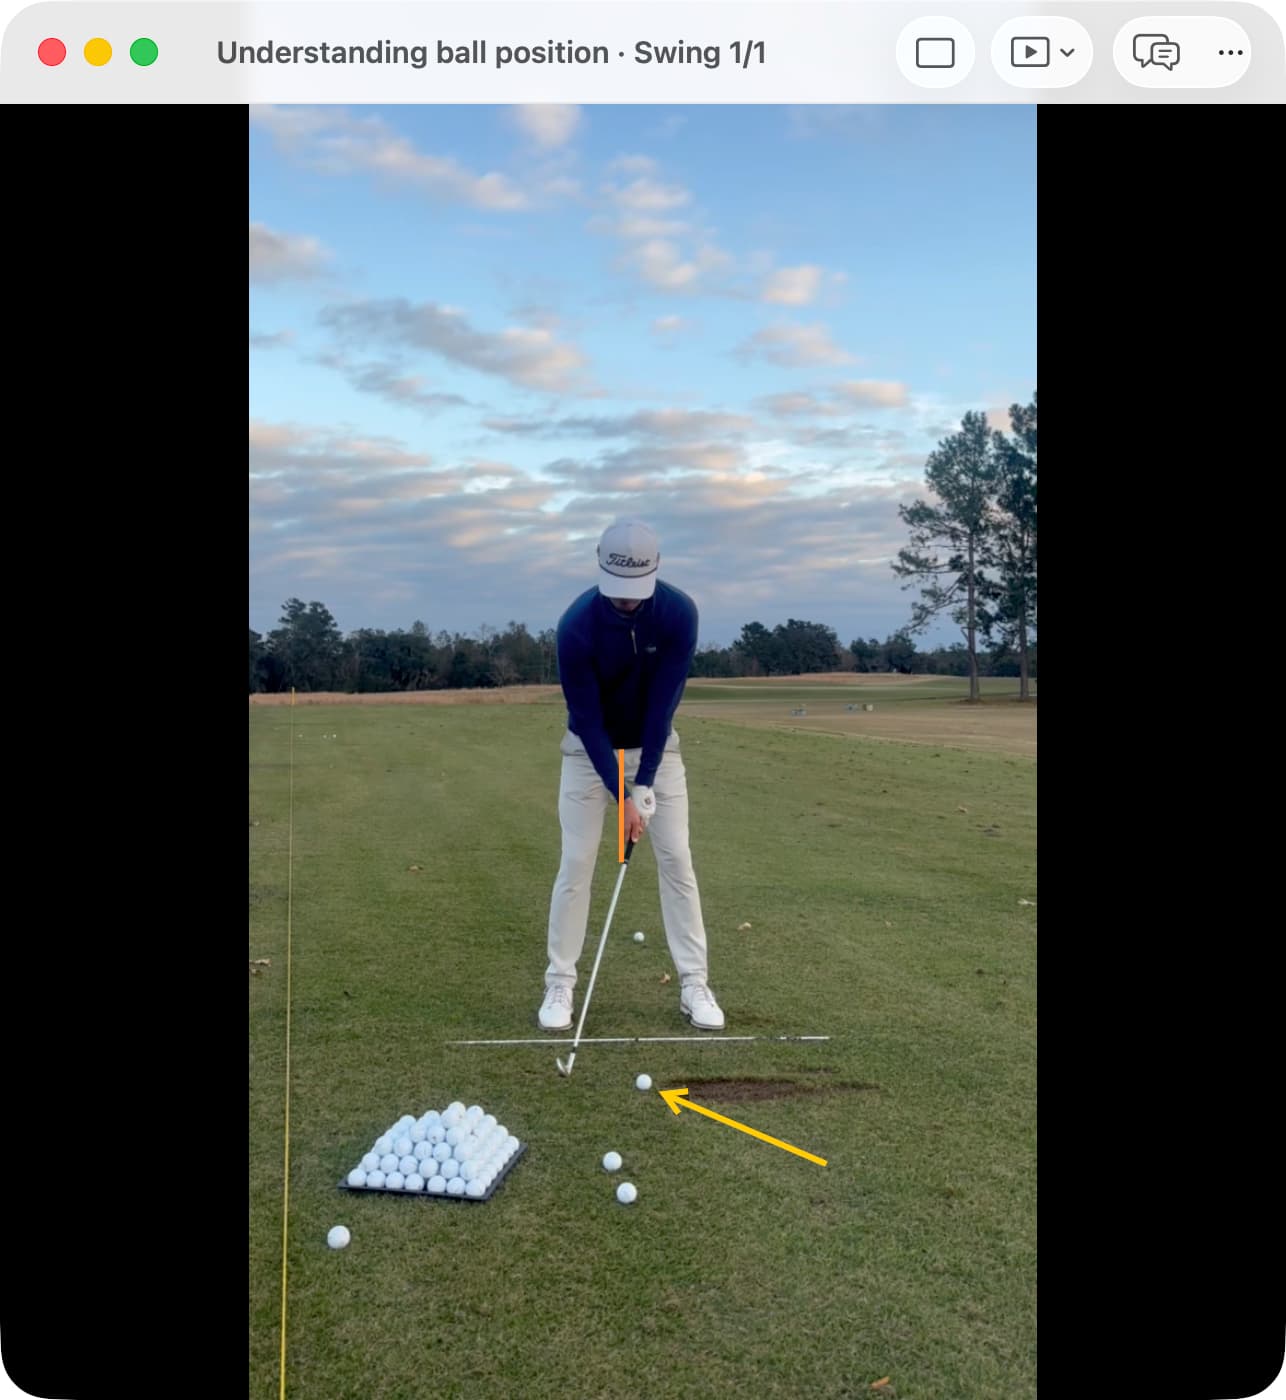
Use the stance sketch below to separate the two setup questions. Moving the ball toward the lead foot changes its position along the stance. Moving your whole stance closer to the ball changes reach. Test one change at a time with the same club.
Try this view with your own swing
- Pause at Address. Open a face-on swing in Video Player and use Jump to position to select Address. Include both feet and the ball in the recording.
- Add one reference. Open AI Overlays and enable the Setup Hip Center Line. Compare the ball with both feet and the starting hip reference; keep stance width and camera position consistent.
- Compare like shots. Keep the camera square to the target line and use the same club and intended shot. Compare ball position alongside strike and flight before deciding whether to adjust it.
In this top-down sketch, the dashed line projects the ball back toward the line between the feet.
Moving the ball toward either foot changes its position along the stance. Moving your whole stance closer changes reach.
Schematic relationships, not a prescribed ball location or stance width.
Understanding the idea.
The club travels down toward its low point and then rises. Moving the ball within the stance changes where contact occurs along that journey. With an iron from the ground, the goal is usually to meet the ball before the lowest part of the arc. With a teed driver, the intended relationship is different.
Moving an iron ball farther back can change attack, delivered loft, and path. Moving it forward can change those relationships in the other direction. The effect depends on how the golfer responds, so a position alone does not guarantee a particular flight or strike.
Face-on video shows the ball relative to the feet and body. Keep the camera square to the target line and include the whole stance. A camera placed toward either foot can make the position appear farther forward or back than it really is. Record the club and intended shot as part of the comparison.
How to read this pattern.
There is no single exact midpoint that suits every mid-iron swing. Stance width, club length, body proportions, and the intended shot all influence a useful starting position. Many golfers play a stock mid-iron around the middle to slightly forward of the middle, then adjust through observed contact.
Do not shove the ball far back simply to manufacture shaft lean, or move it dramatically forward to force height. Those changes can alter other parts of the delivery. Specialty shots deserve their own setup rather than being treated as evidence that the stock position is wrong.
A practice cue.
Return the ball to a consistent spot for the chosen shot.
Try the exercise.
Mark and compare
- Choose a mid-iron, level lie, and modest target. Note the ball’s position relative to both feet. Use a small ground mark or an alignment reference outside the club’s path so you can reproduce the starting stance and ball location.
- Hit an easy set from that position and note the strike. Move only the ball a small amount toward the lead or trail foot for the next set. Keep stance width, club, target, and effort the same.
- Return to the starting position and compare again. Check where ground contact begins as well as the flight. A mat can hide ground-first contact; use a permitted strike board if available. Keep the position that gives the more repeatable strike for this shot.
What to record
For each set, note ball-first or ground-first contact and the intended flight. Keep the position that produces the more repeatable result, then rebuild it after stepping away.
Practice set: Hit 5 easy shots from the baseline position, then 5 after one small adjustment, and compare the sets.
Keep in mind: Let the ball wait in a repeatable spot rather than searching for it during the swing.
Review the result.
For a practice comparison, record 5 full mid-iron swings from a face-on view, keeping the club in frame. Use the same setup for both sets; label shorter drill swings separately.
A useful ball position makes contact and flight more predictable for the intended shot. It should also be easy to set again after stepping away. Do not judge success by whether the ball matches a line drawn exactly halfway between the feet.
Watch these clips.
These demonstrations offer another way to understand the idea. Each video opens at the selected starting point and continues playing; use the note below it to focus your viewing.
The setup discussion connects stance, ball position, and face aim. Keep the club and intended shot consistent when testing one of those variables.
The mirror rehearsal makes stance width and ball position easier to compare. Use it as a repeatability check, not a universal midpoint rule.