
3 of 10
Backswing.
Backswing shows the club rising as the turn develops. Use it to understand the route to the top, rather than to demand one fixed arm height or shaft plane.
By Dwain Kinghorn · Updated
Arm and club rise with the turn.
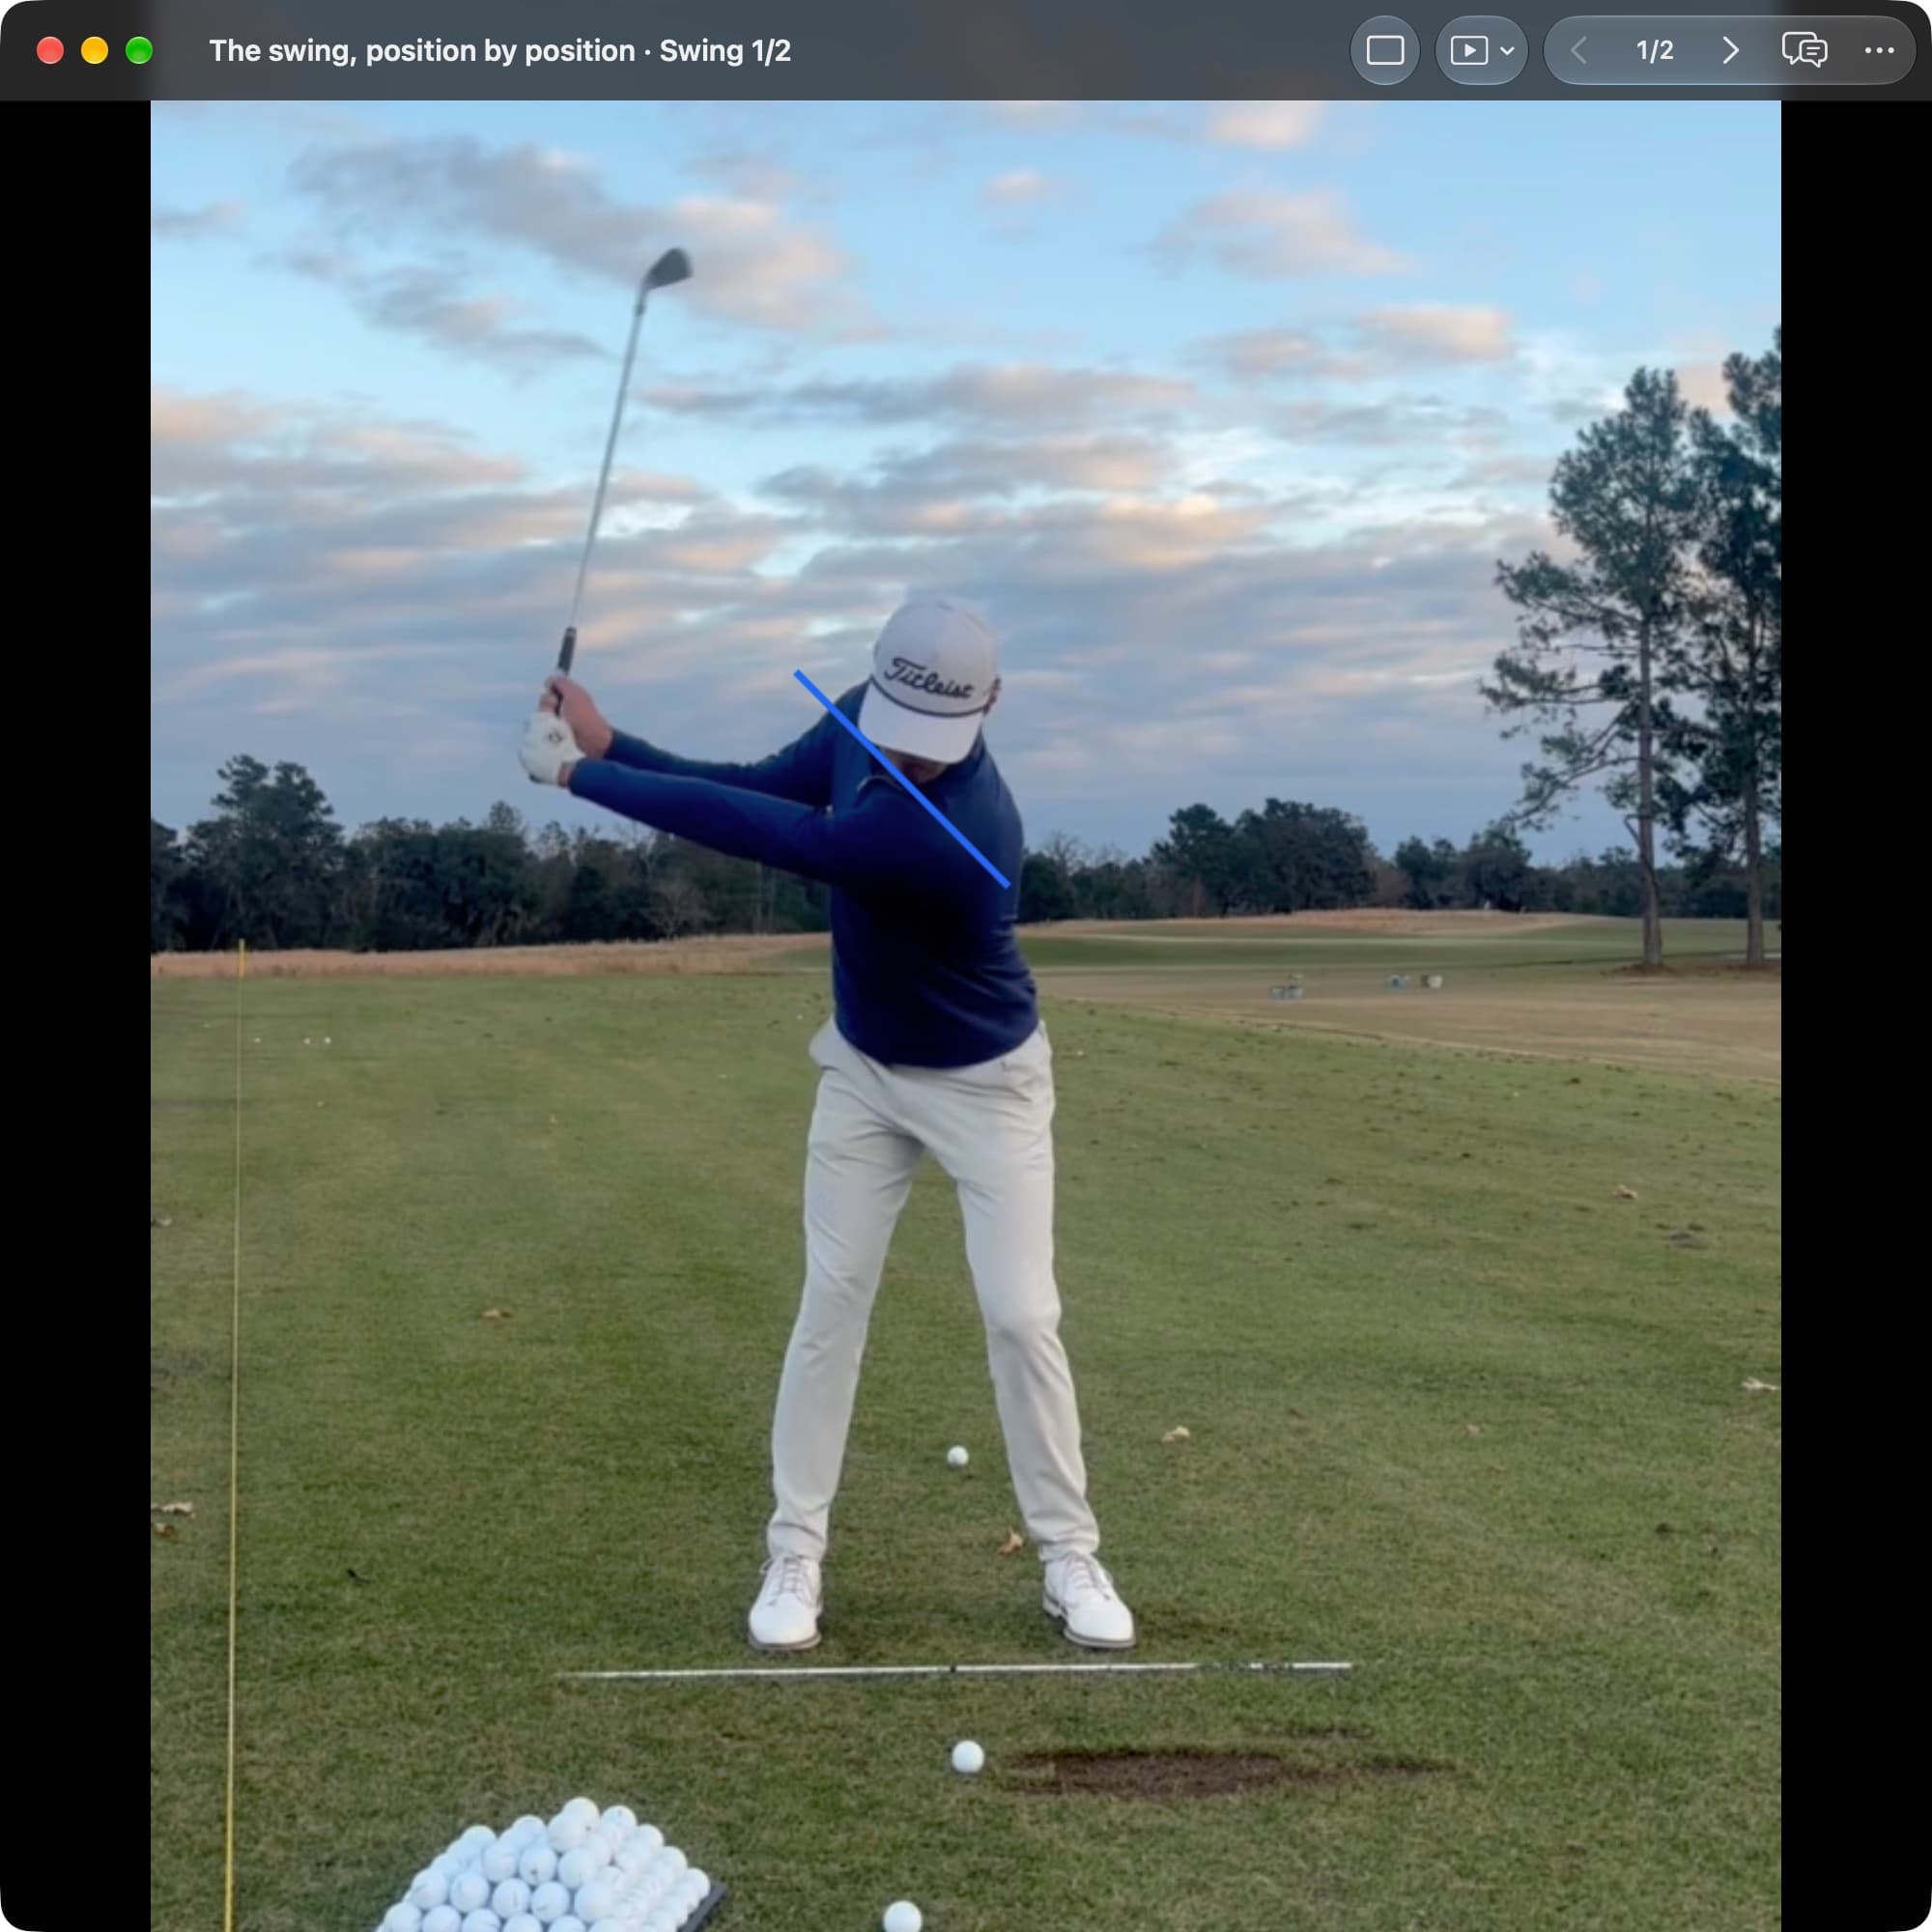
Midway through the backswing the club is rising while the body keeps turning. Read the shoulders face-on and the lead arm down-the-line.
Face-on

Down-the-line
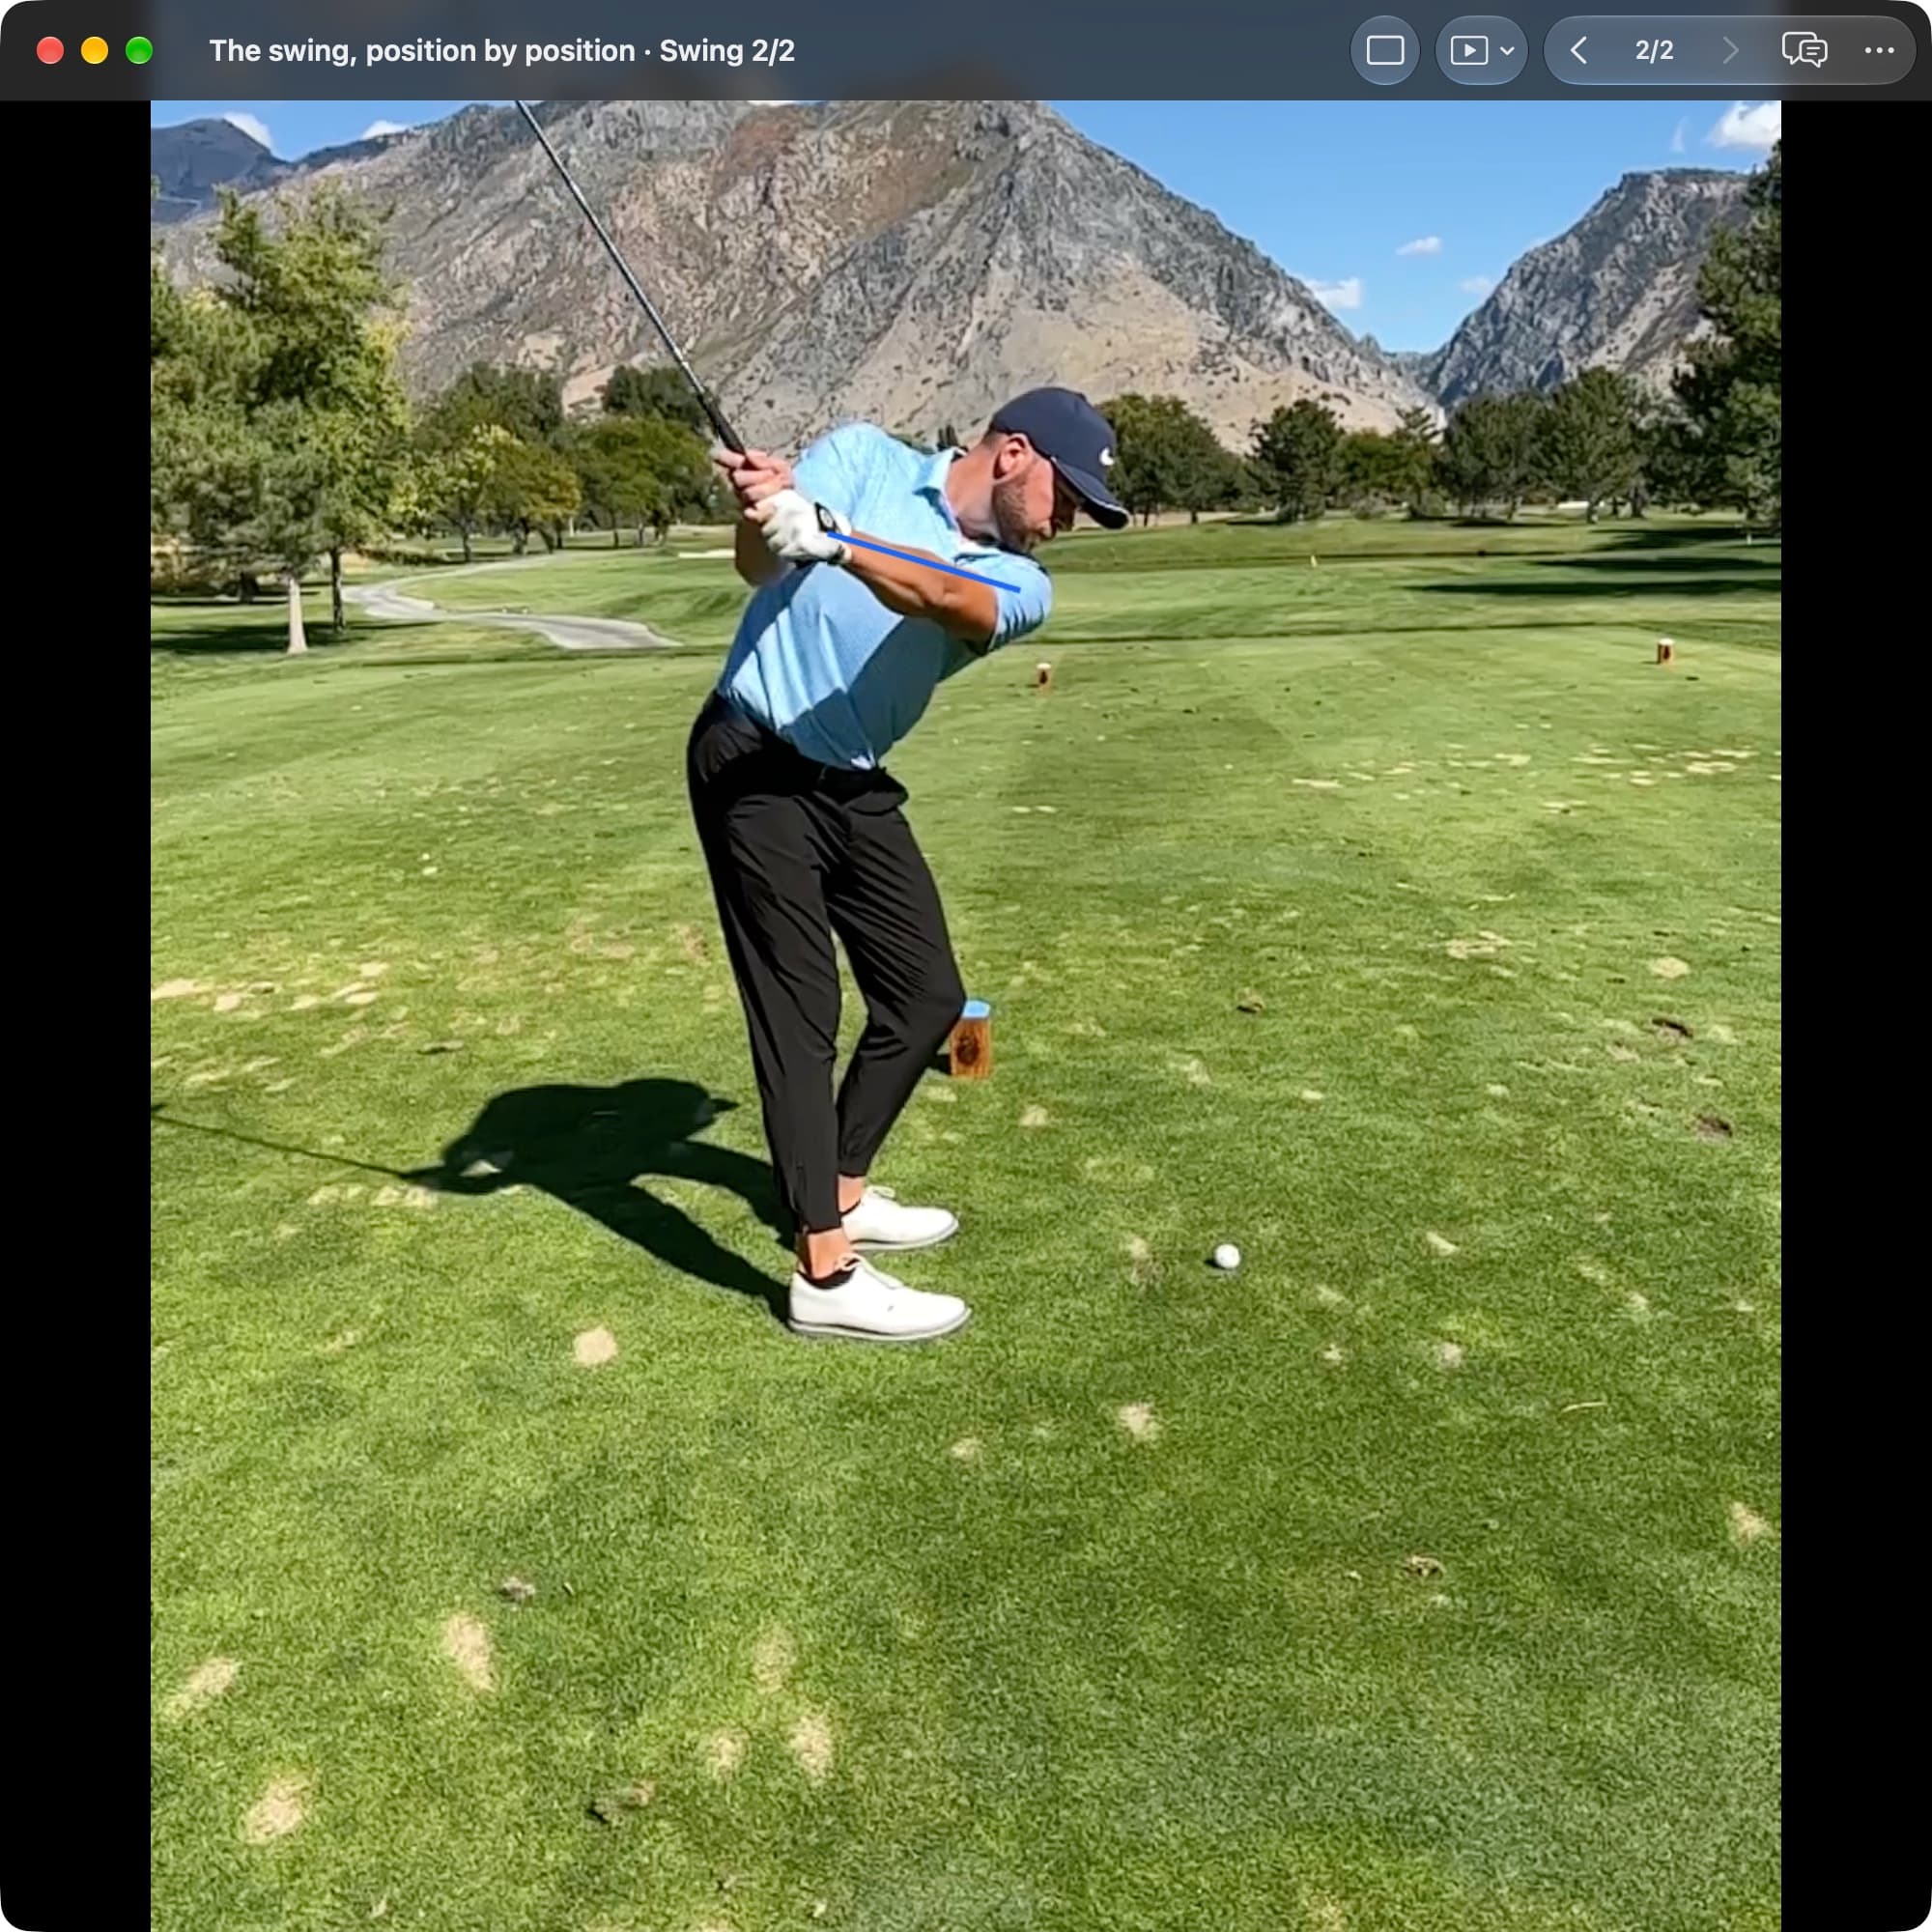

The backswing is a stage on the way to the top. Its value lies in where it leads, so compare it with the frames that follow rather than grading the arm or shaft in isolation.
Try this view with your own swing
- Choose the frame. Open the swing in Video Player and use Jump to position to select Backswing. Step a frame either way to see the motion around it.
- Add one live line. In AI Overlays, turn on the Live toggle for Lead Arm Line in a down-the-line recording, or Shoulder Tilt Line in a face-on recording.
- Continue to the top. Step through to Top and Transition and keep the camera position the same when comparing your own swings.
Understanding this position.
Between Takeaway and Top, the club moves upward and around the body. The wrists change their relationship to the shaft, the arms rise, and the body turns. The proportions and timing of those movements differ among golfers and clubs.
Read the selected Backswing frame as part of that progression. Face-on is useful for lateral movement and the relationship between the arms and torso. Down-the-line helps show the club's inclination and position around the body. Neither view alone reveals the full three-dimensional motion.
How to read the position.
A later wrist set, a shorter arm swing, or a lower arm plane can be functional. The backswing does not have to reach a predetermined height to produce a solid shot.
Be careful with the phrase in front of the body. As the torso turns and the arms move, the club can appear behind the golfer from one camera without being trapped in the eventual delivery. Judge whether the route supports a manageable transition, not whether it remains inside an imagined flat box.
Read each camera view.
Face-on
Follow the hands rising and moving around with the turn. Their height depends on the stage of the backswing and the golfer’s comfortable motion.
What this view can show.
- Hands and club
- Follow the hands rising and moving around with the turn. Their height depends on the stage of the backswing and the golfer’s comfortable motion.
- Wrist and clubface
- Notice the shaft-to-arm relationship developing. Wrist set can occur earlier or later; the visible angle is not a measure of stored power.
- Shaft orientation
- The shaft rises as the club travels back. Compare its direction across adjacent frames before deciding that it has been lifted or laid down abruptly.
- Pelvis and space
- Observe rotation and sideways travel relative to the feet. A manageable shift can support the turn; a large drift is worth following into the downswing.
- Chest and shoulders
- The shoulder line changes as the torso turns and bends. Do not interpret one tilted line as the complete orientation of the spine.
- Body rotation
- The chest often turns more than the pelvis, but the difference varies. A still cannot establish the forces or elastic energy involved.
- Feet and balance
- Look at visible foot movement and balance. A lead heel may rise in some swings; that alone does not make the backswing unstable.
Video shows foot movement and balance, not pressure distribution or ground-reaction force.
Down-the-line
Observe the hands’ route upward and around the body. Judge whether it leads to a comfortable top rather than requiring a single height relative to the shoulder.
What this view can show.
- Hands and club
- Observe the hands’ route upward and around the body. Judge whether it leads to a comfortable top rather than requiring a single height relative to the shoulder.
- Wrist and clubface
- The face may be partly hidden. If its orientation is unclear, leave it uncertain instead of inferring it from the glove or wrist alone.
- Shaft orientation
- Look at the shaft’s inclination and how it changes. Low, inside, and laid off describe different relationships and should not be used interchangeably.
- Pelvis and space
- The trail side of the pelvis commonly moves back with rotation. That outline change differs from pushing the whole pelvis toward the ball.
- Chest and shoulders
- Observe the chest turning while the body remains able to reach the ball. Some change in bend is normal during the backswing.
- Body rotation
- Use the chest and pelvis together to understand the turn. Exact rotational differences require more than this two-dimensional outline.
- Feet and balance
- Notice whether the golfer remains supported rather than obviously stumbling or reaching. Video cannot determine the pressure split beneath the feet.
Video shows foot movement and balance, not pressure distribution or ground-reaction force.
Continue to Top and Transition. The key question is whether the club can change direction without a difficult recovery. Do not conclude that a backswing is effective simply because it resembles a preferred checkpoint.
When comparing a practice change, match the club and swing intention. A shorter backswing may improve contact and comfort even if it looks less complete. Preserve those outcomes rather than adding length for appearance alone.
Watch these clips.
Use these demonstrations to put the still into motion. Each video opens at the selected starting point and continues playing; the note below explains its relevance to this position.
The face-on comparison distinguishes rotation from lateral drift. Follow the pelvis and upper body together as the backswing develops.
The trail-arm examples show how the arm and club organize on the way up. Their value is understanding the route, not imposing one elbow position.