
2 of 10
Takeaway.
Takeaway is the opening movement away from the ball. Read the club’s route in relation to the turn, without expecting it to travel straight back indefinitely.
By Dwain Kinghorn · Updated
Watch the club leave with the turn.
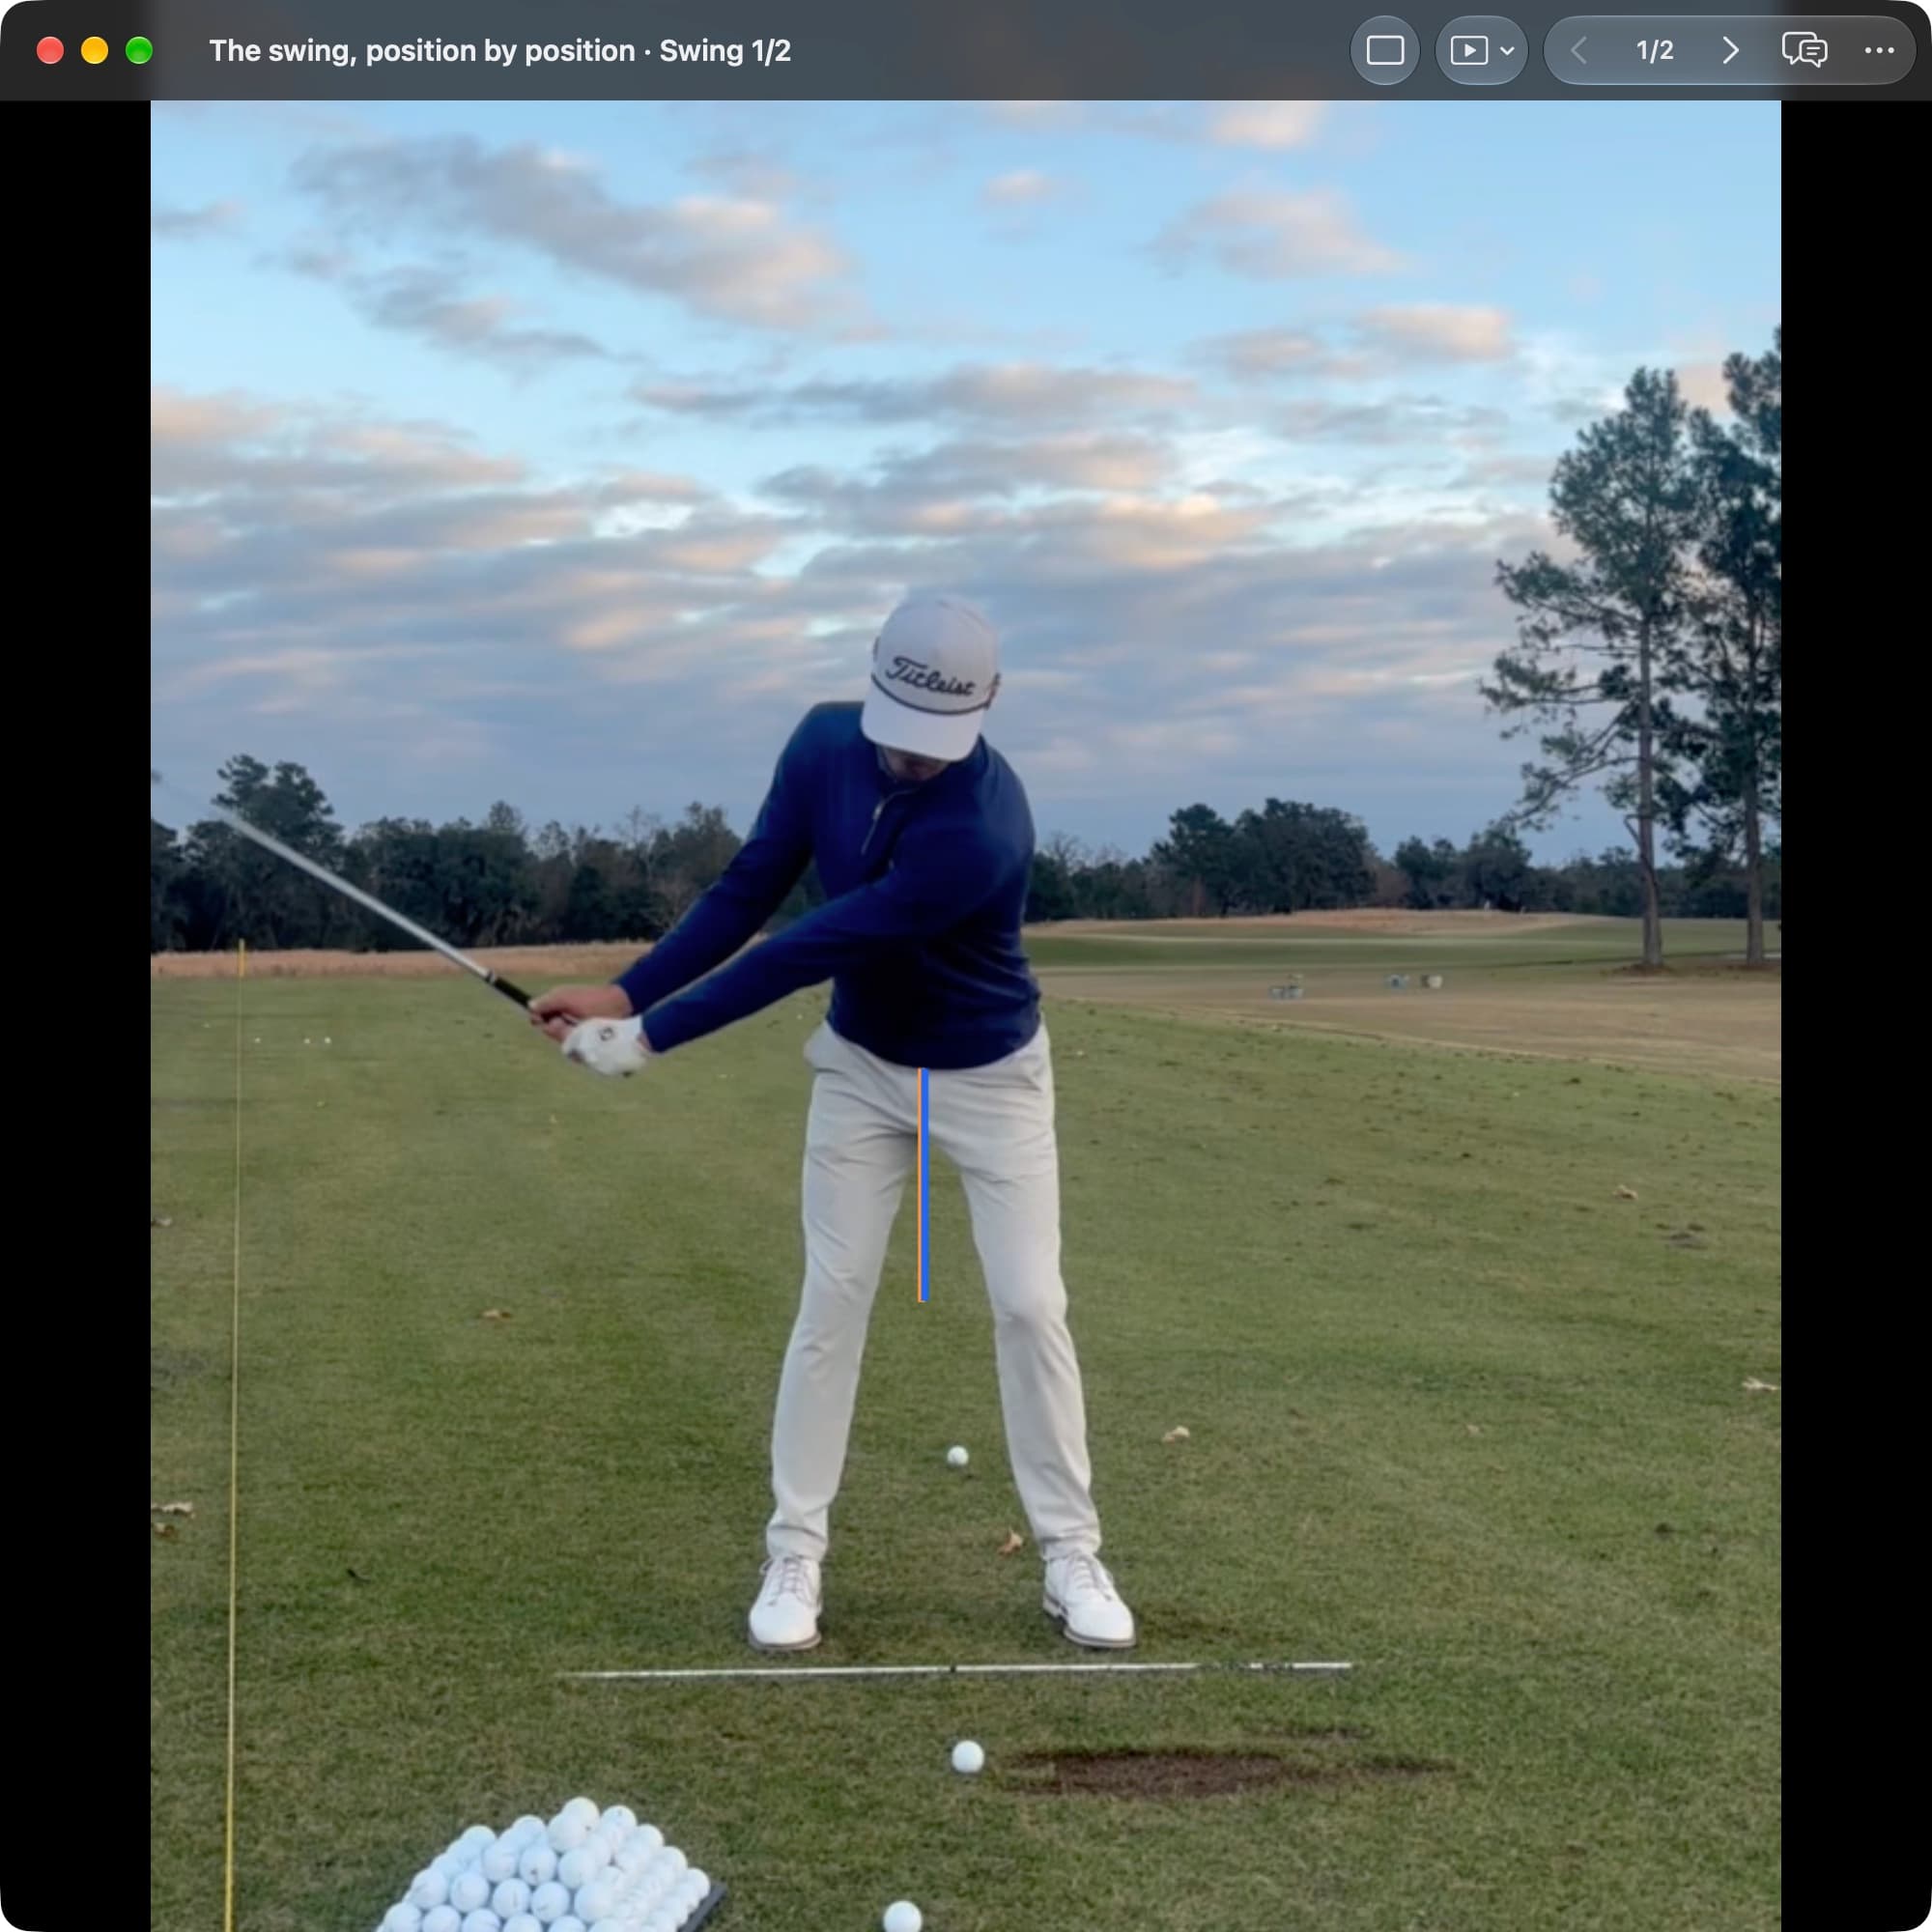
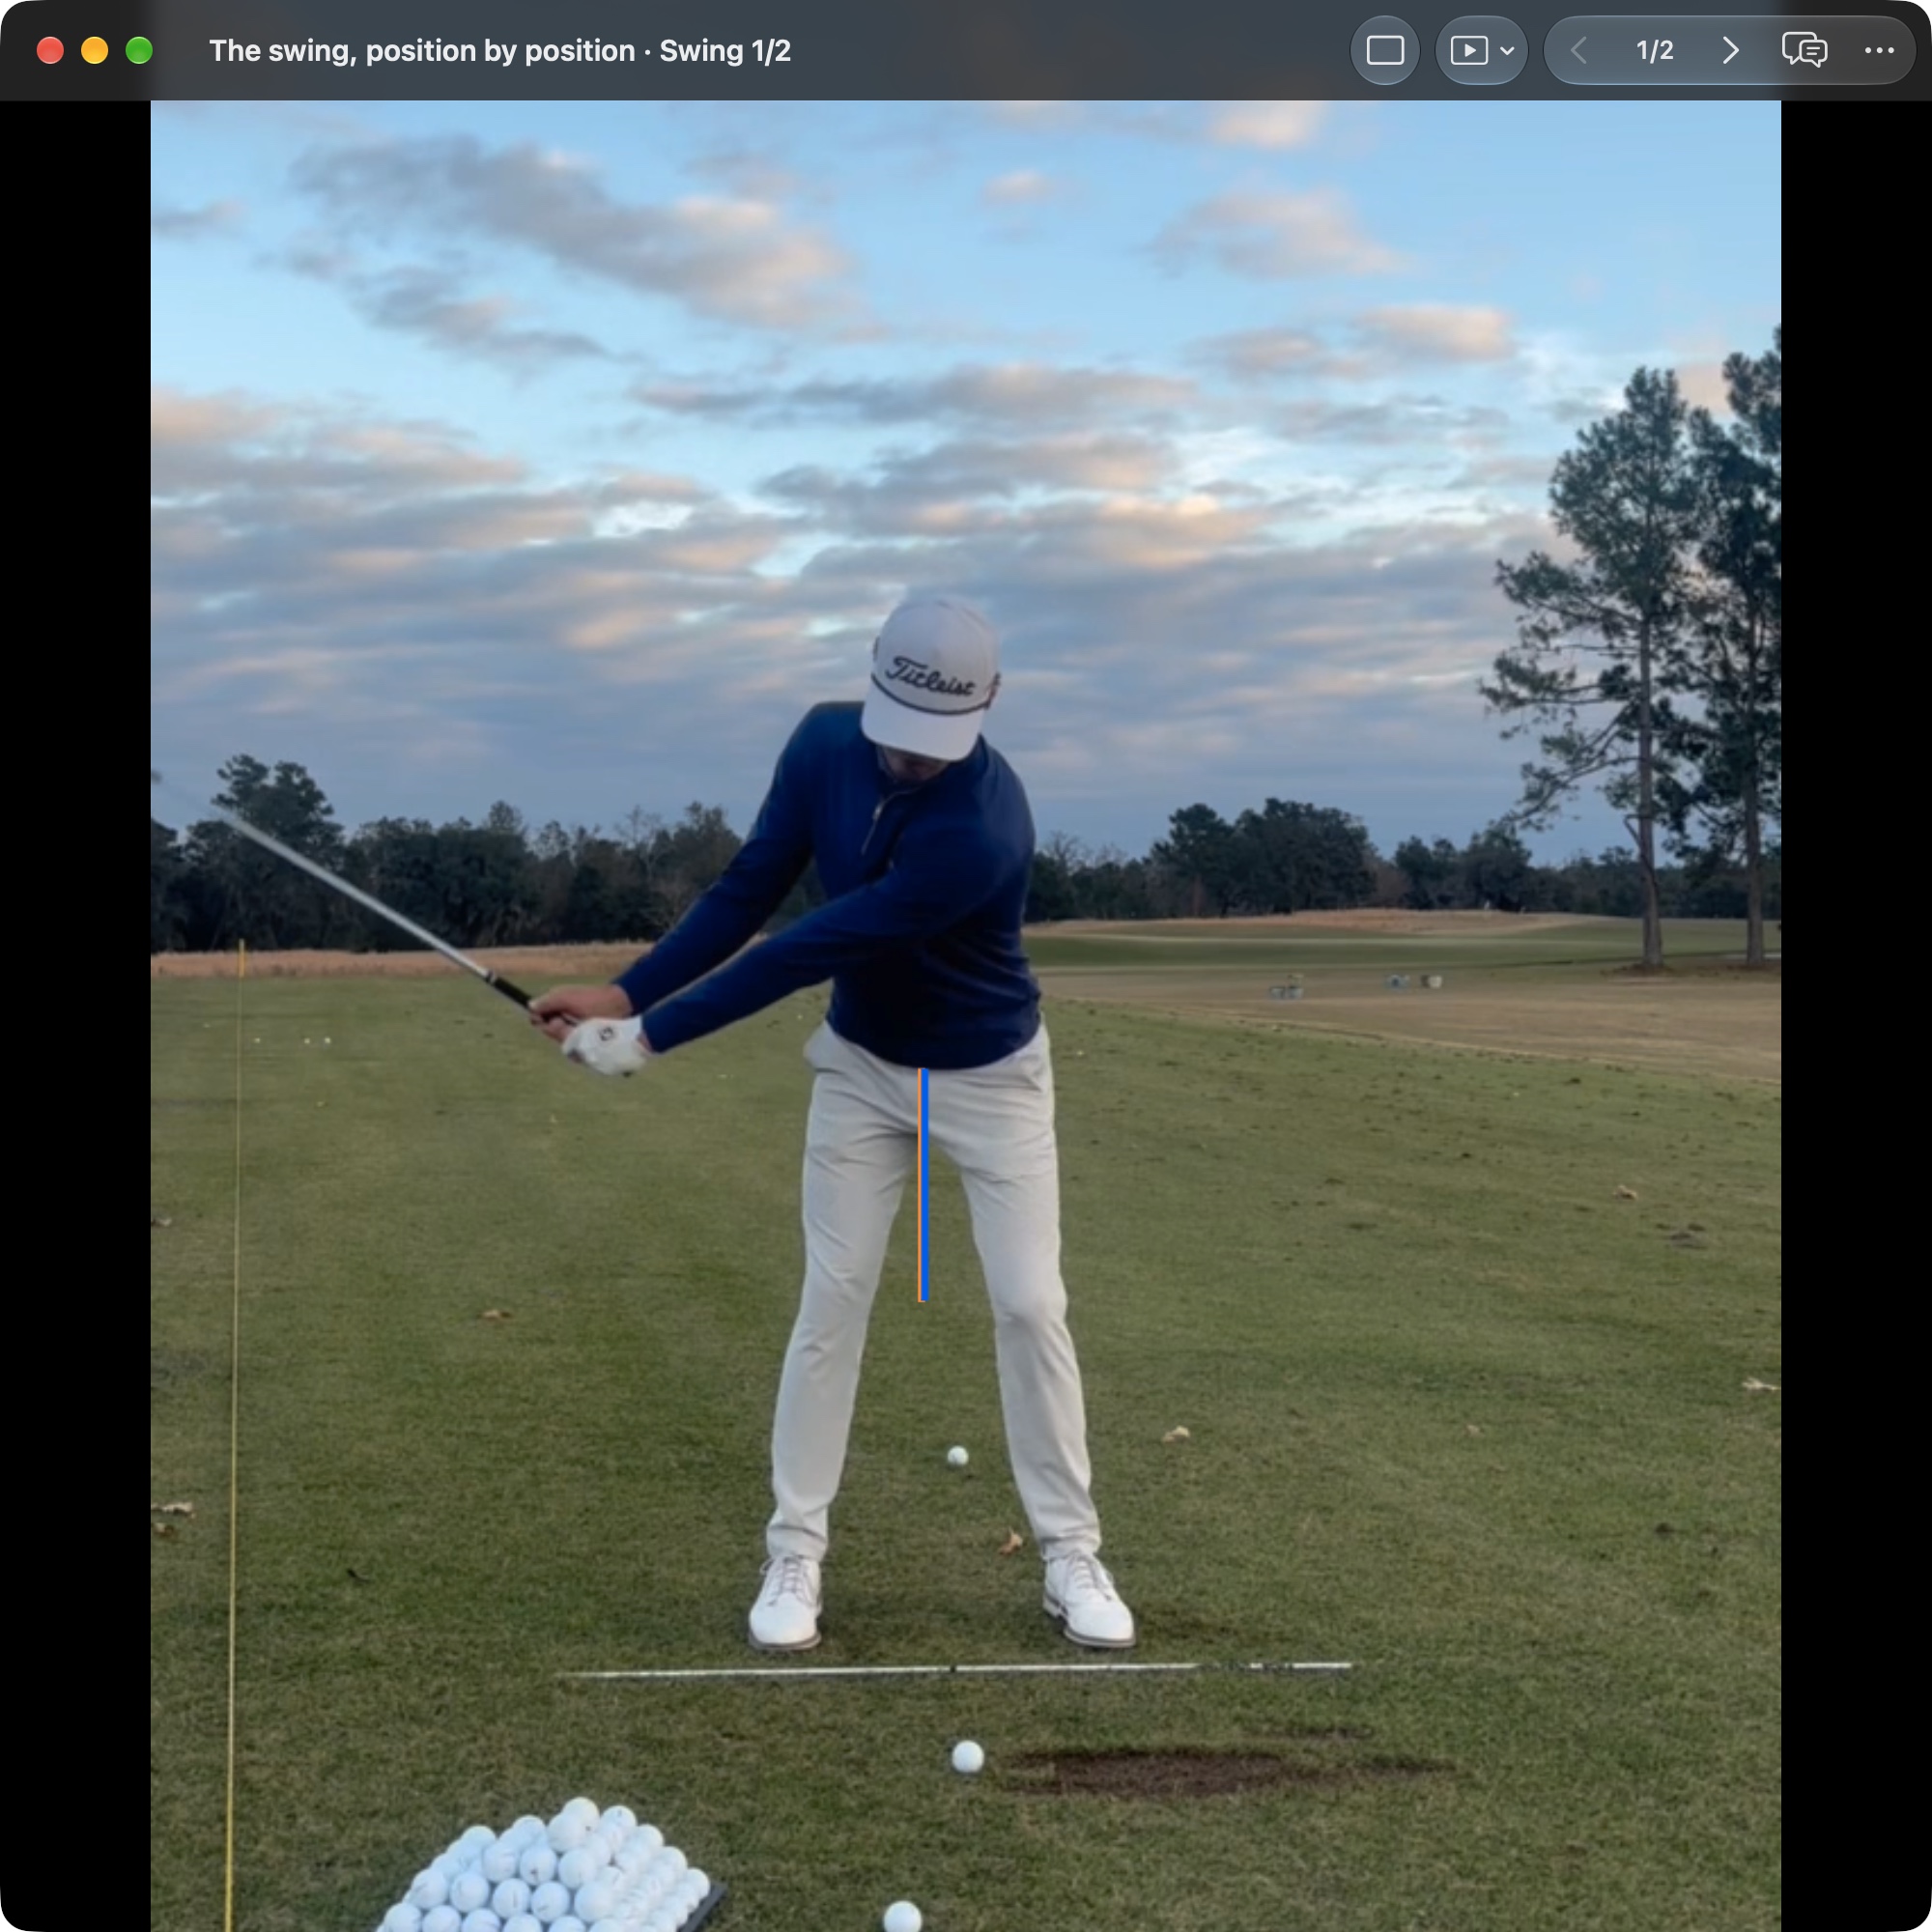
The same two golfers used throughout this series, as the club moves away from the ball. Face-on shows how the body starts turning; down-the-line shows the club's route against its Address reference.
Face-on
Down-the-line
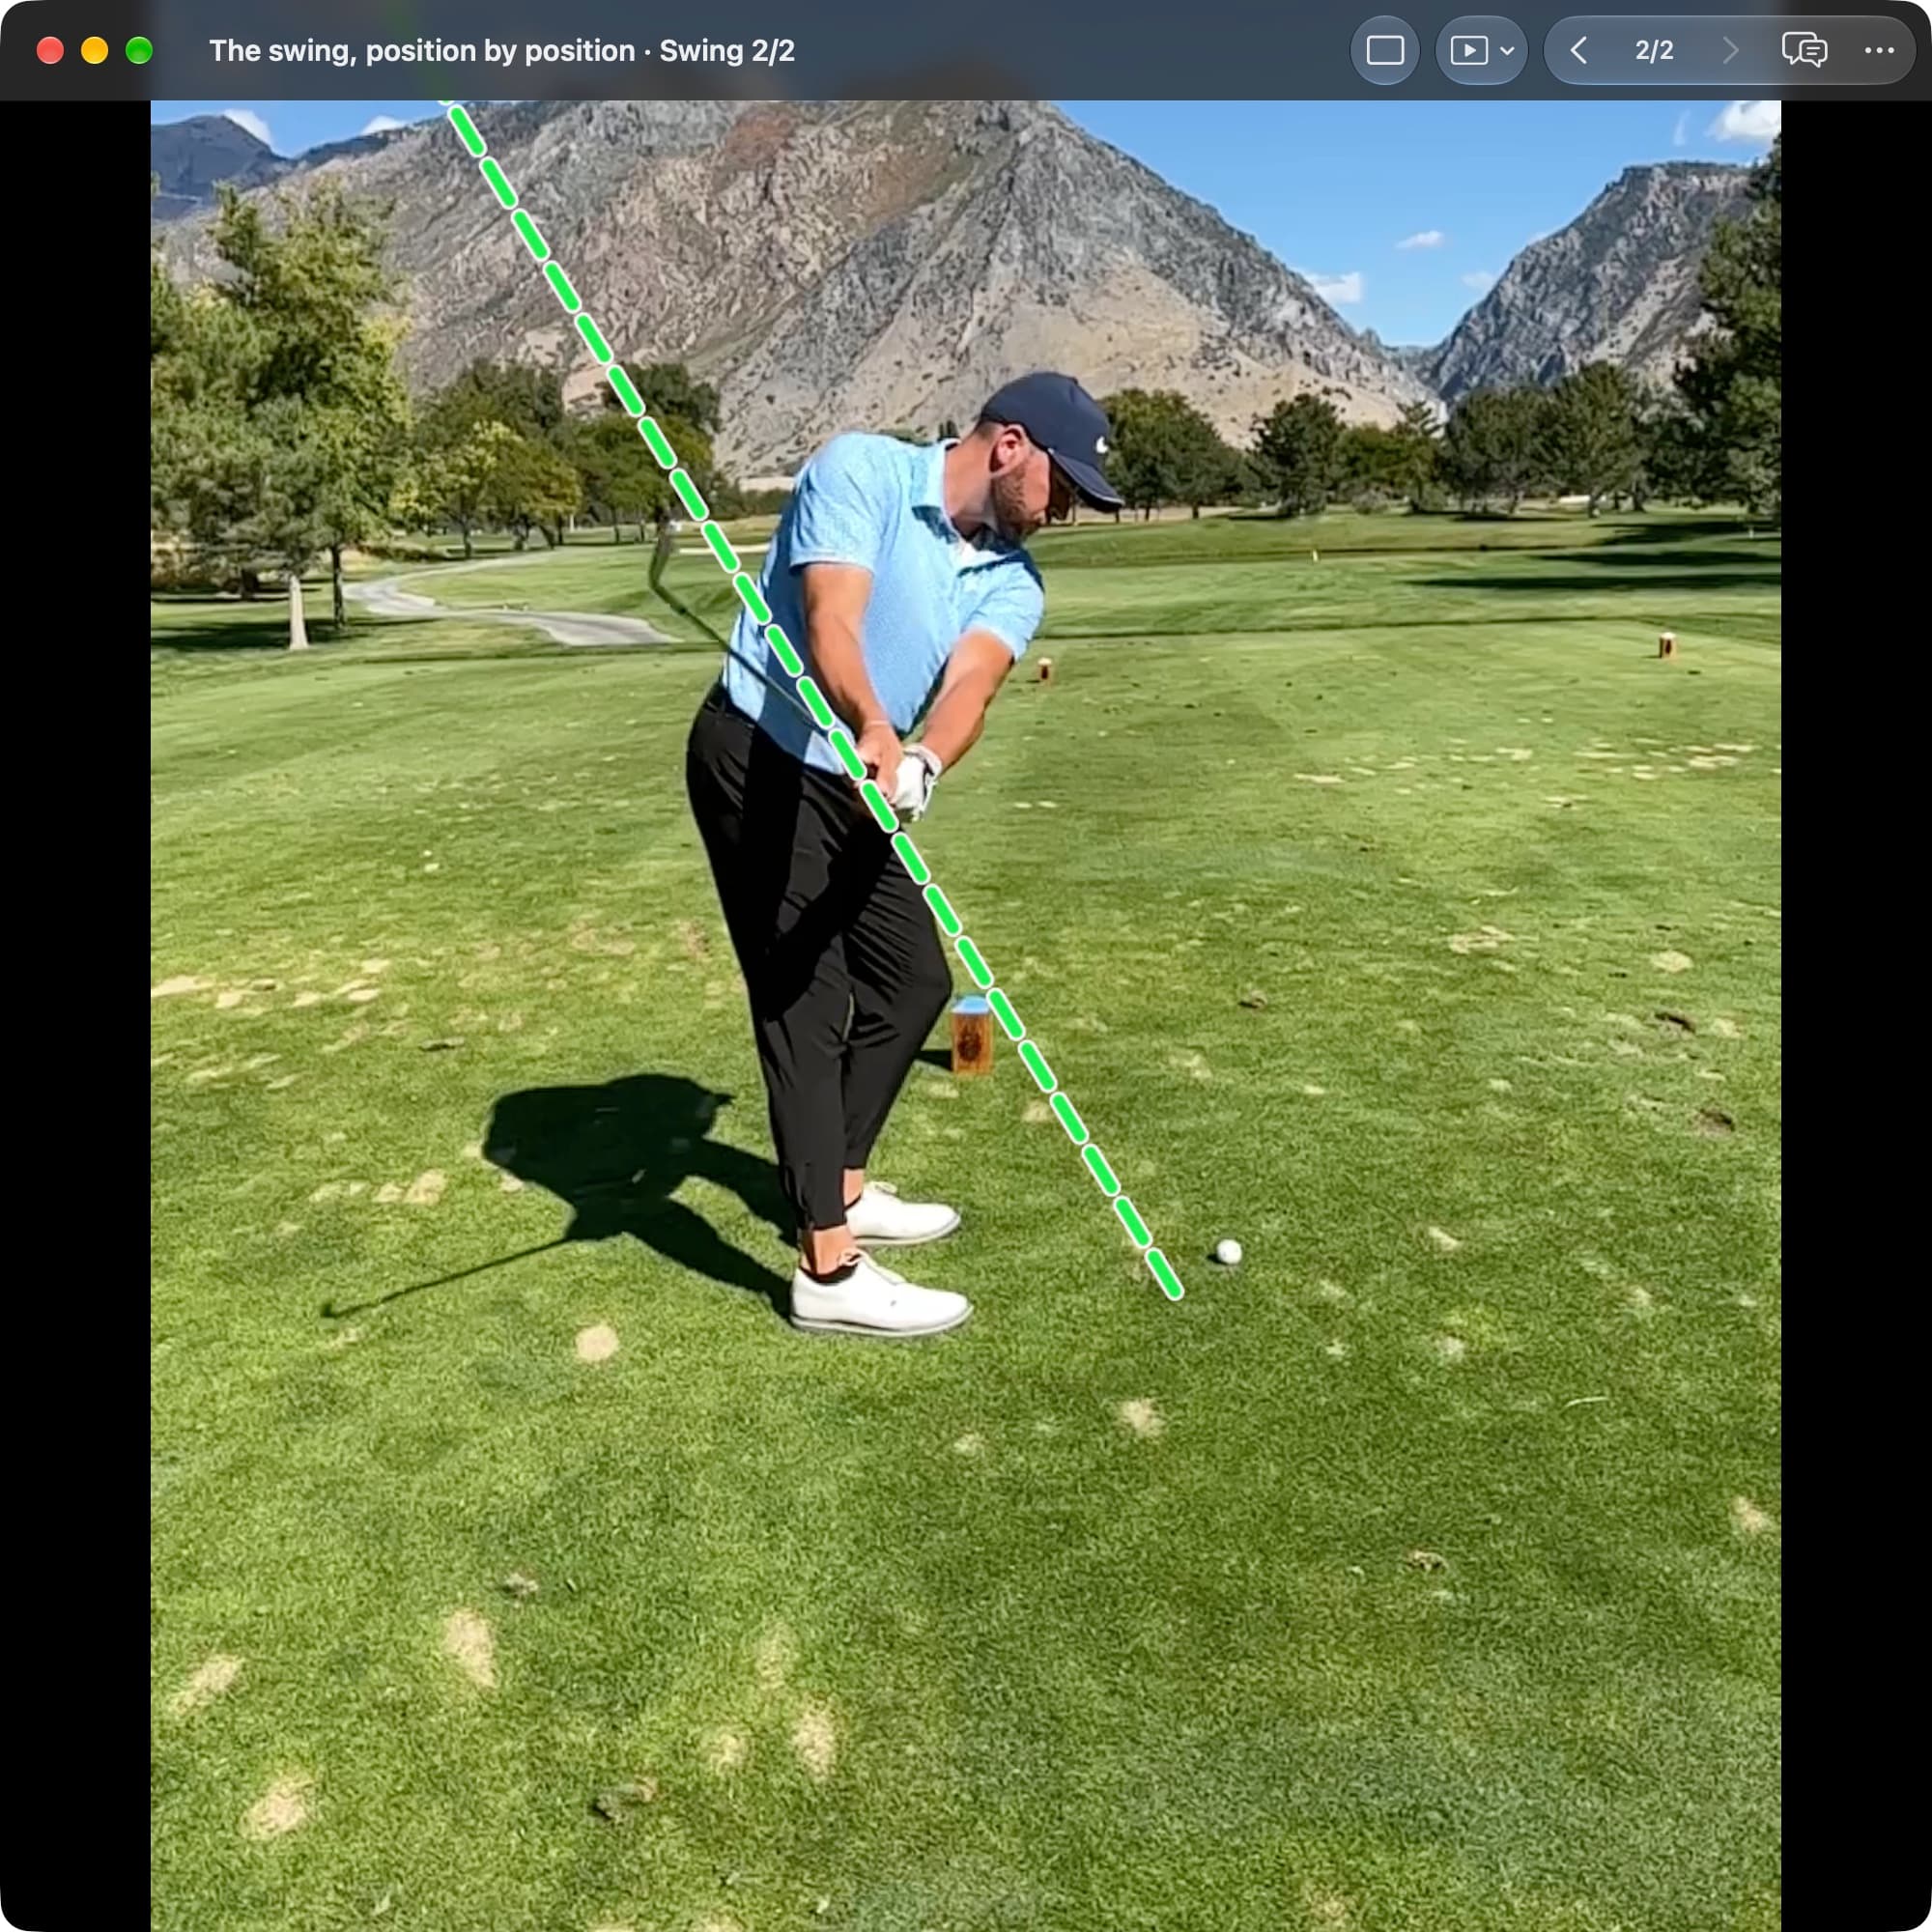
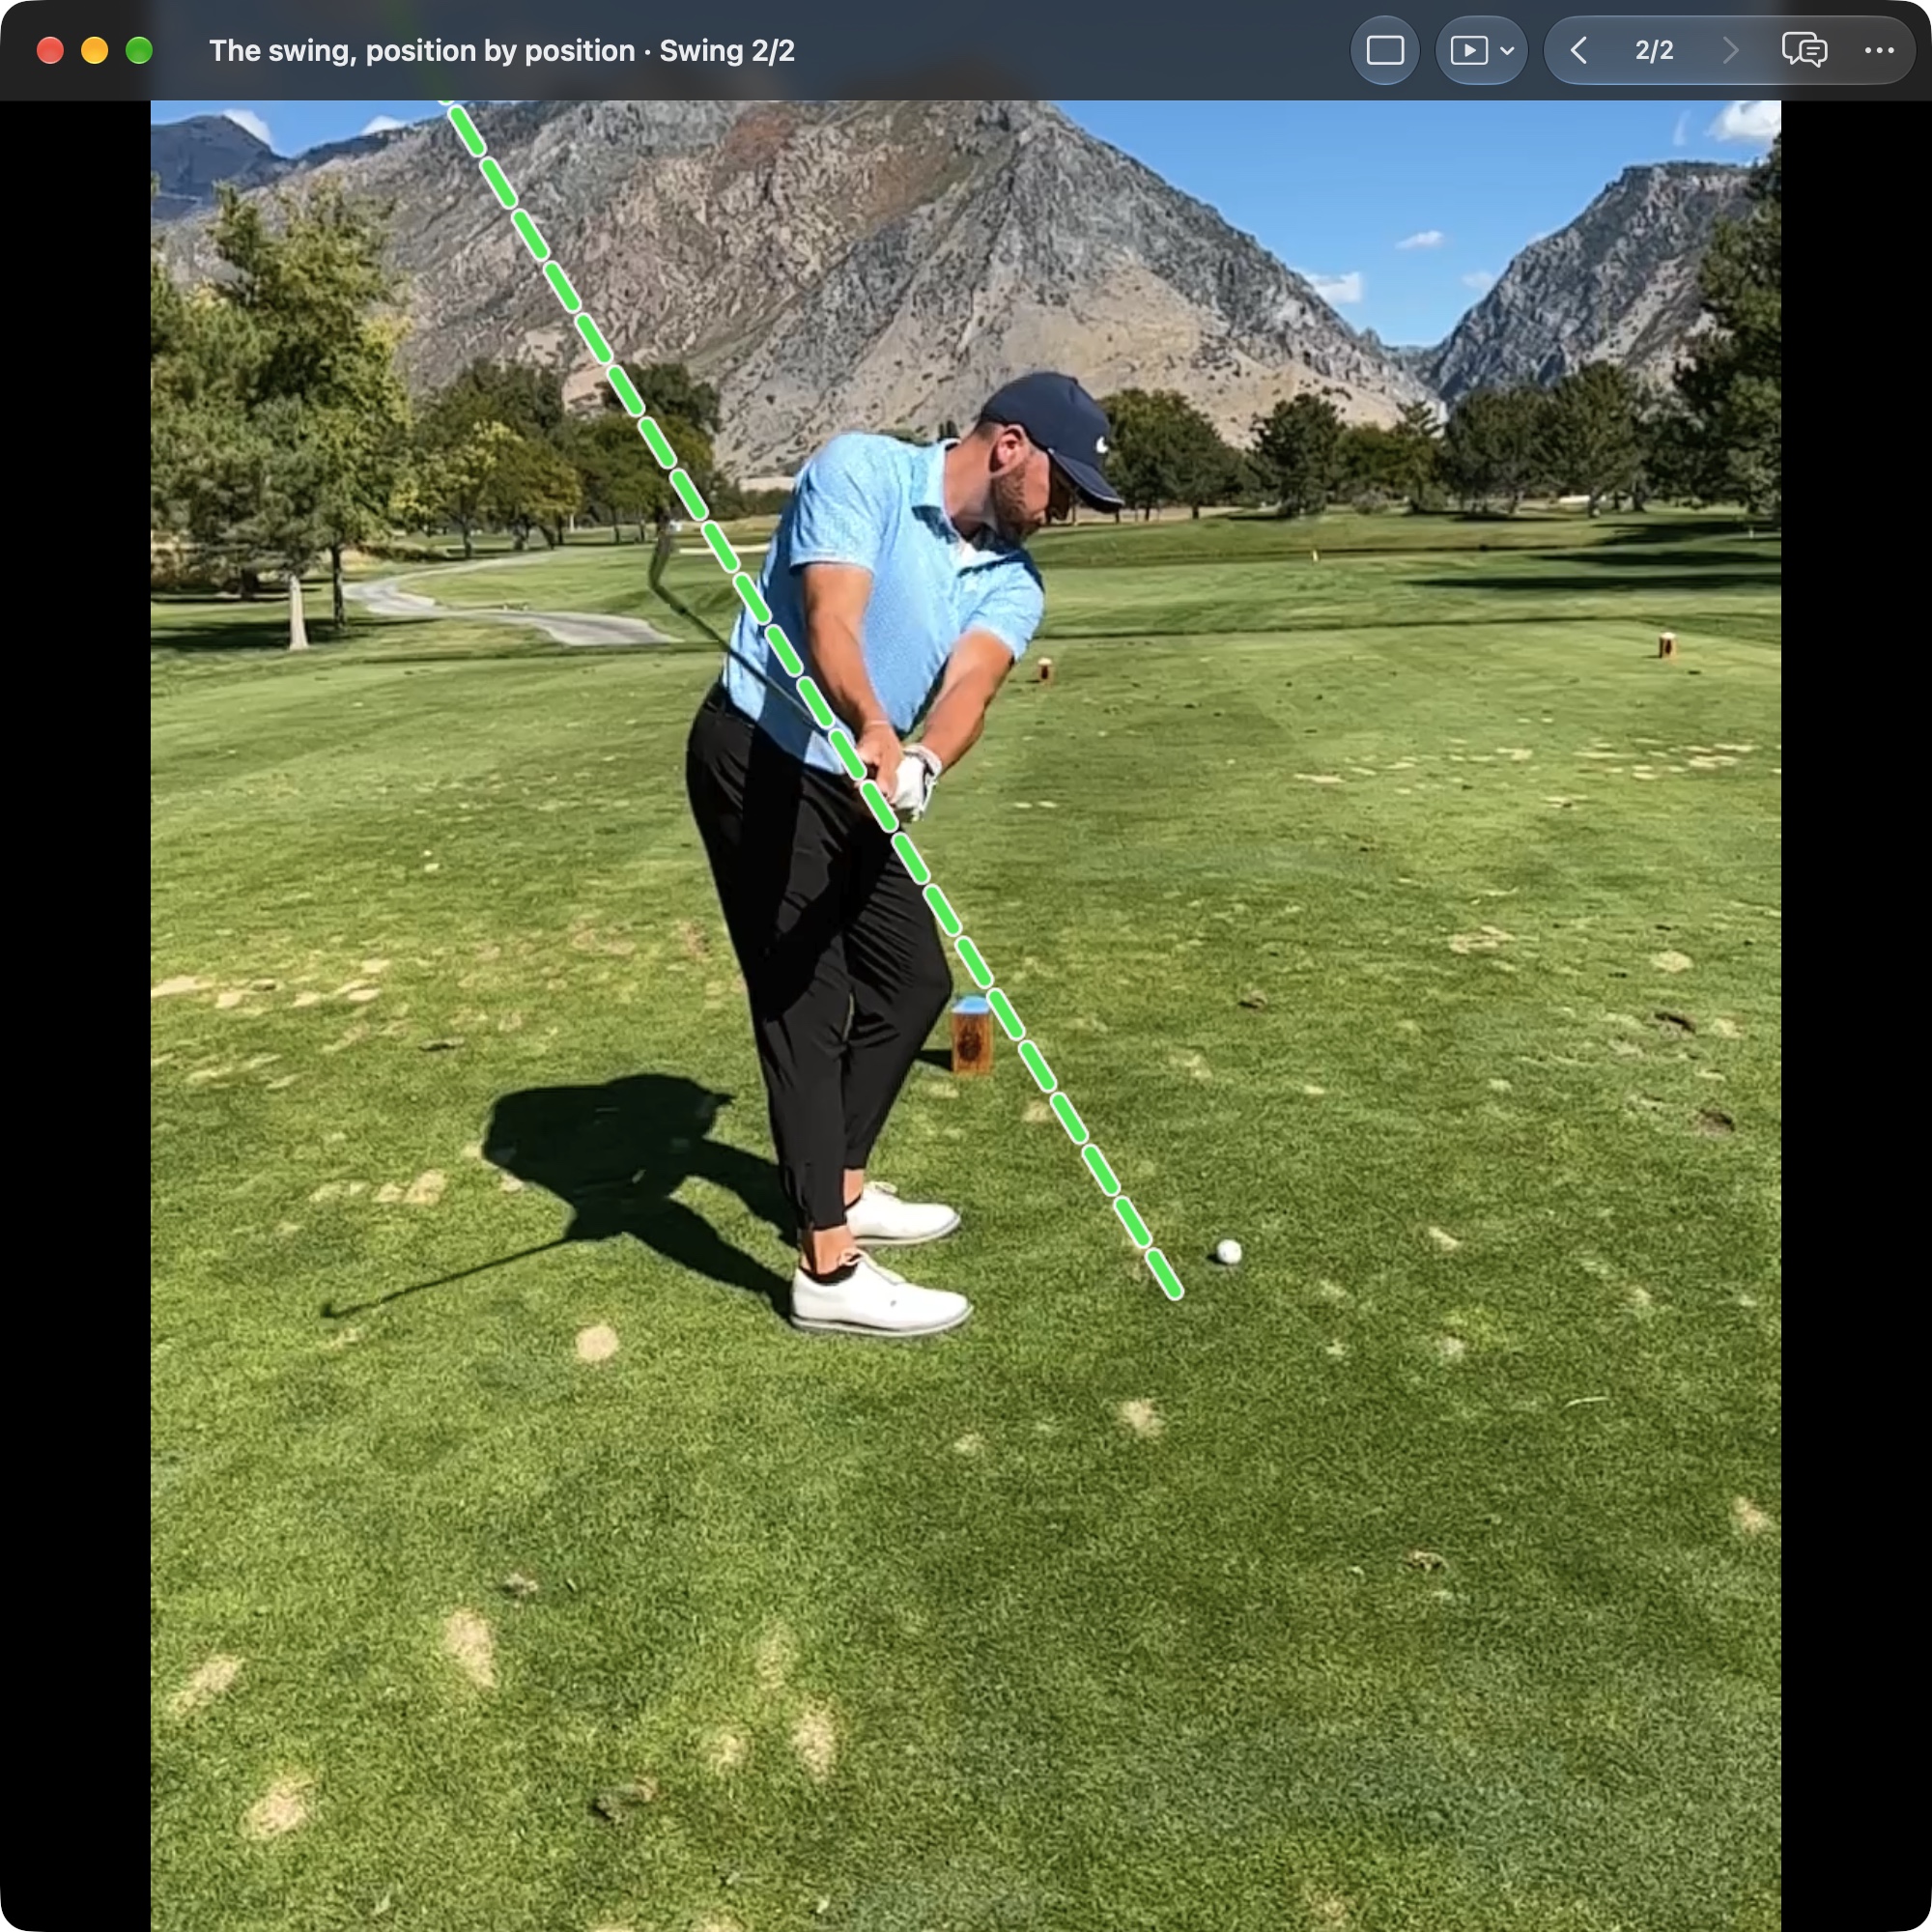
Takeaway is about a manageable route, not a straight line back. Compare the club with its own Address reference and watch the next few frames before judging an early shape.
Try this view with your own swing
- Choose the frame. Open the swing in Video Player and use Jump to position to select Takeaway. Step a frame either way to see the motion around it.
- Add a reference. In AI Overlays, turn on Address Plane (in the shaft overlays) in a down-the-line recording, or both the Setup and Live toggles for Hip Center Line in a face-on recording.
- Follow it forward. Step on toward Backswing. A takeaway is useful when it leads into a comfortable backswing, not when it matches a line exactly.
Understanding this position.
The takeaway begins the club's journey around the golfer. Hands, arms, and body contribute to that movement, and their exact timing varies. This frame is useful for seeing the initial direction and whether an abrupt manipulation appears before the backswing develops.
Start from Address and play into the early backswing. The selected Takeaway still is a reference within that interval, not a universal checkpoint at one exact shaft height. Compare equivalent moments before interpreting a difference between two swings.
How to read the position.
Some inward movement is normal because the swing is an arc. A club slightly inside or outside a reference line does not automatically predict a fault later. The full route through the top and back down matters.
The clubface also changes its appearance as the shaft and body move. Toe-up is not the only acceptable early picture. Grip, wrist motion, and camera angle all influence what is visible, so avoid diagnosing an open or closed impact face from this frame alone.
Read each camera view.
Face-on
Follow the hands and clubhead as they leave the ball. Their movement should be interpreted together; the hands do not have to remain directly over the target line.
What this view can show.
- Hands and club
- Follow the hands and clubhead as they leave the ball. Their movement should be interpreted together; the hands do not have to remain directly over the target line.
- Wrist and clubface
- Observe whether the face and shaft move smoothly or change orientation abruptly. A wrist shape alone does not establish the exact clubface direction.
- Shaft orientation
- The club remains relatively low early in the takeaway, then rises. Compare similar moments rather than one early frame with another golfer’s later backswing.
- Pelvis and space
- Look for the beginning of a turn and any lateral shift. A small shift can be functional; a large drift needs to be evaluated through the return to the ball.
- Chest and shoulders
- The chest begins turning with the developing arm motion. The shoulders need not move as a rigid block with the hands.
- Body rotation
- The chest and pelvis may turn by different amounts. There is no required gap at this early stage, and a still cannot show their speeds.
- Feet and balance
- Foot contact and visible balance can be observed. The amount of loading under the trail foot cannot be inferred from both soles remaining down.
Video shows foot movement and balance, not pressure distribution or ground-reaction force.
Down-the-line
Watch whether the hands and club have a manageable route away from the ball. A small inward arc is expected, not evidence that the club is already stuck.
What this view can show.
- Hands and club
- Watch whether the hands and club have a manageable route away from the ball. A small inward arc is expected, not evidence that the club is already stuck.
- Wrist and clubface
- The leading edge and toe offer clues about face orientation. Interpret them with the shaft and grip rather than treating one toe position as a universal rule.
- Shaft orientation
- Compare the club’s initial route with the address reference. A small departure is normal; an abrupt roll or lift is something to follow through later frames.
- Pelvis and space
- Use the address pelvis position to observe the start of rotation. A turning hip changes the outline without necessarily moving the entire pelvis toward the ball.
- Chest and shoulders
- Look at the turn and forward bend together. A shoulder appearing lower may reflect rotation on a tilted body rather than a loss of posture.
- Body rotation
- Notice the relationship between chest and pelvis without requiring them to stay locked together. Coordination is clearer in motion than in the frozen outline.
- Feet and balance
- Watch for obvious instability, but do not turn a knee or heel position into a pressure reading. Both feet can remain planted while pressure changes substantially.
Video shows foot movement and balance, not pressure distribution or ground-reaction force.
Continue into Backswing and Top before deciding that the takeaway needs work. An unusual start may blend into a reliable delivery; a conventional-looking start does not guarantee one.
If testing a takeaway adjustment, keep the task small and compare contact as well as the route. A slower rehearsal can clarify the movement, but judge transfer using ordinary swings of the same shot type.
Watch these clips.
Use these demonstrations to put the still into motion. Each video opens at the selected starting point and continues playing; the note below explains its relevance to this position.
The early-movement examples make the club’s initial route easier to recognize. Check how that route develops rather than diagnosing the full swing from its first motion.
The takeaway rehearsal offers feedback on the opening route. Use it to observe the club without requiring a perfectly straight path away from the ball.