
6 of 10
Downswing.
Downswing shows the club approaching the hitting area after transition. Read the route and available space together rather than treating one shaft line as the ideal delivery.
By Dwain Kinghorn · Updated
Read the route back to the ball.
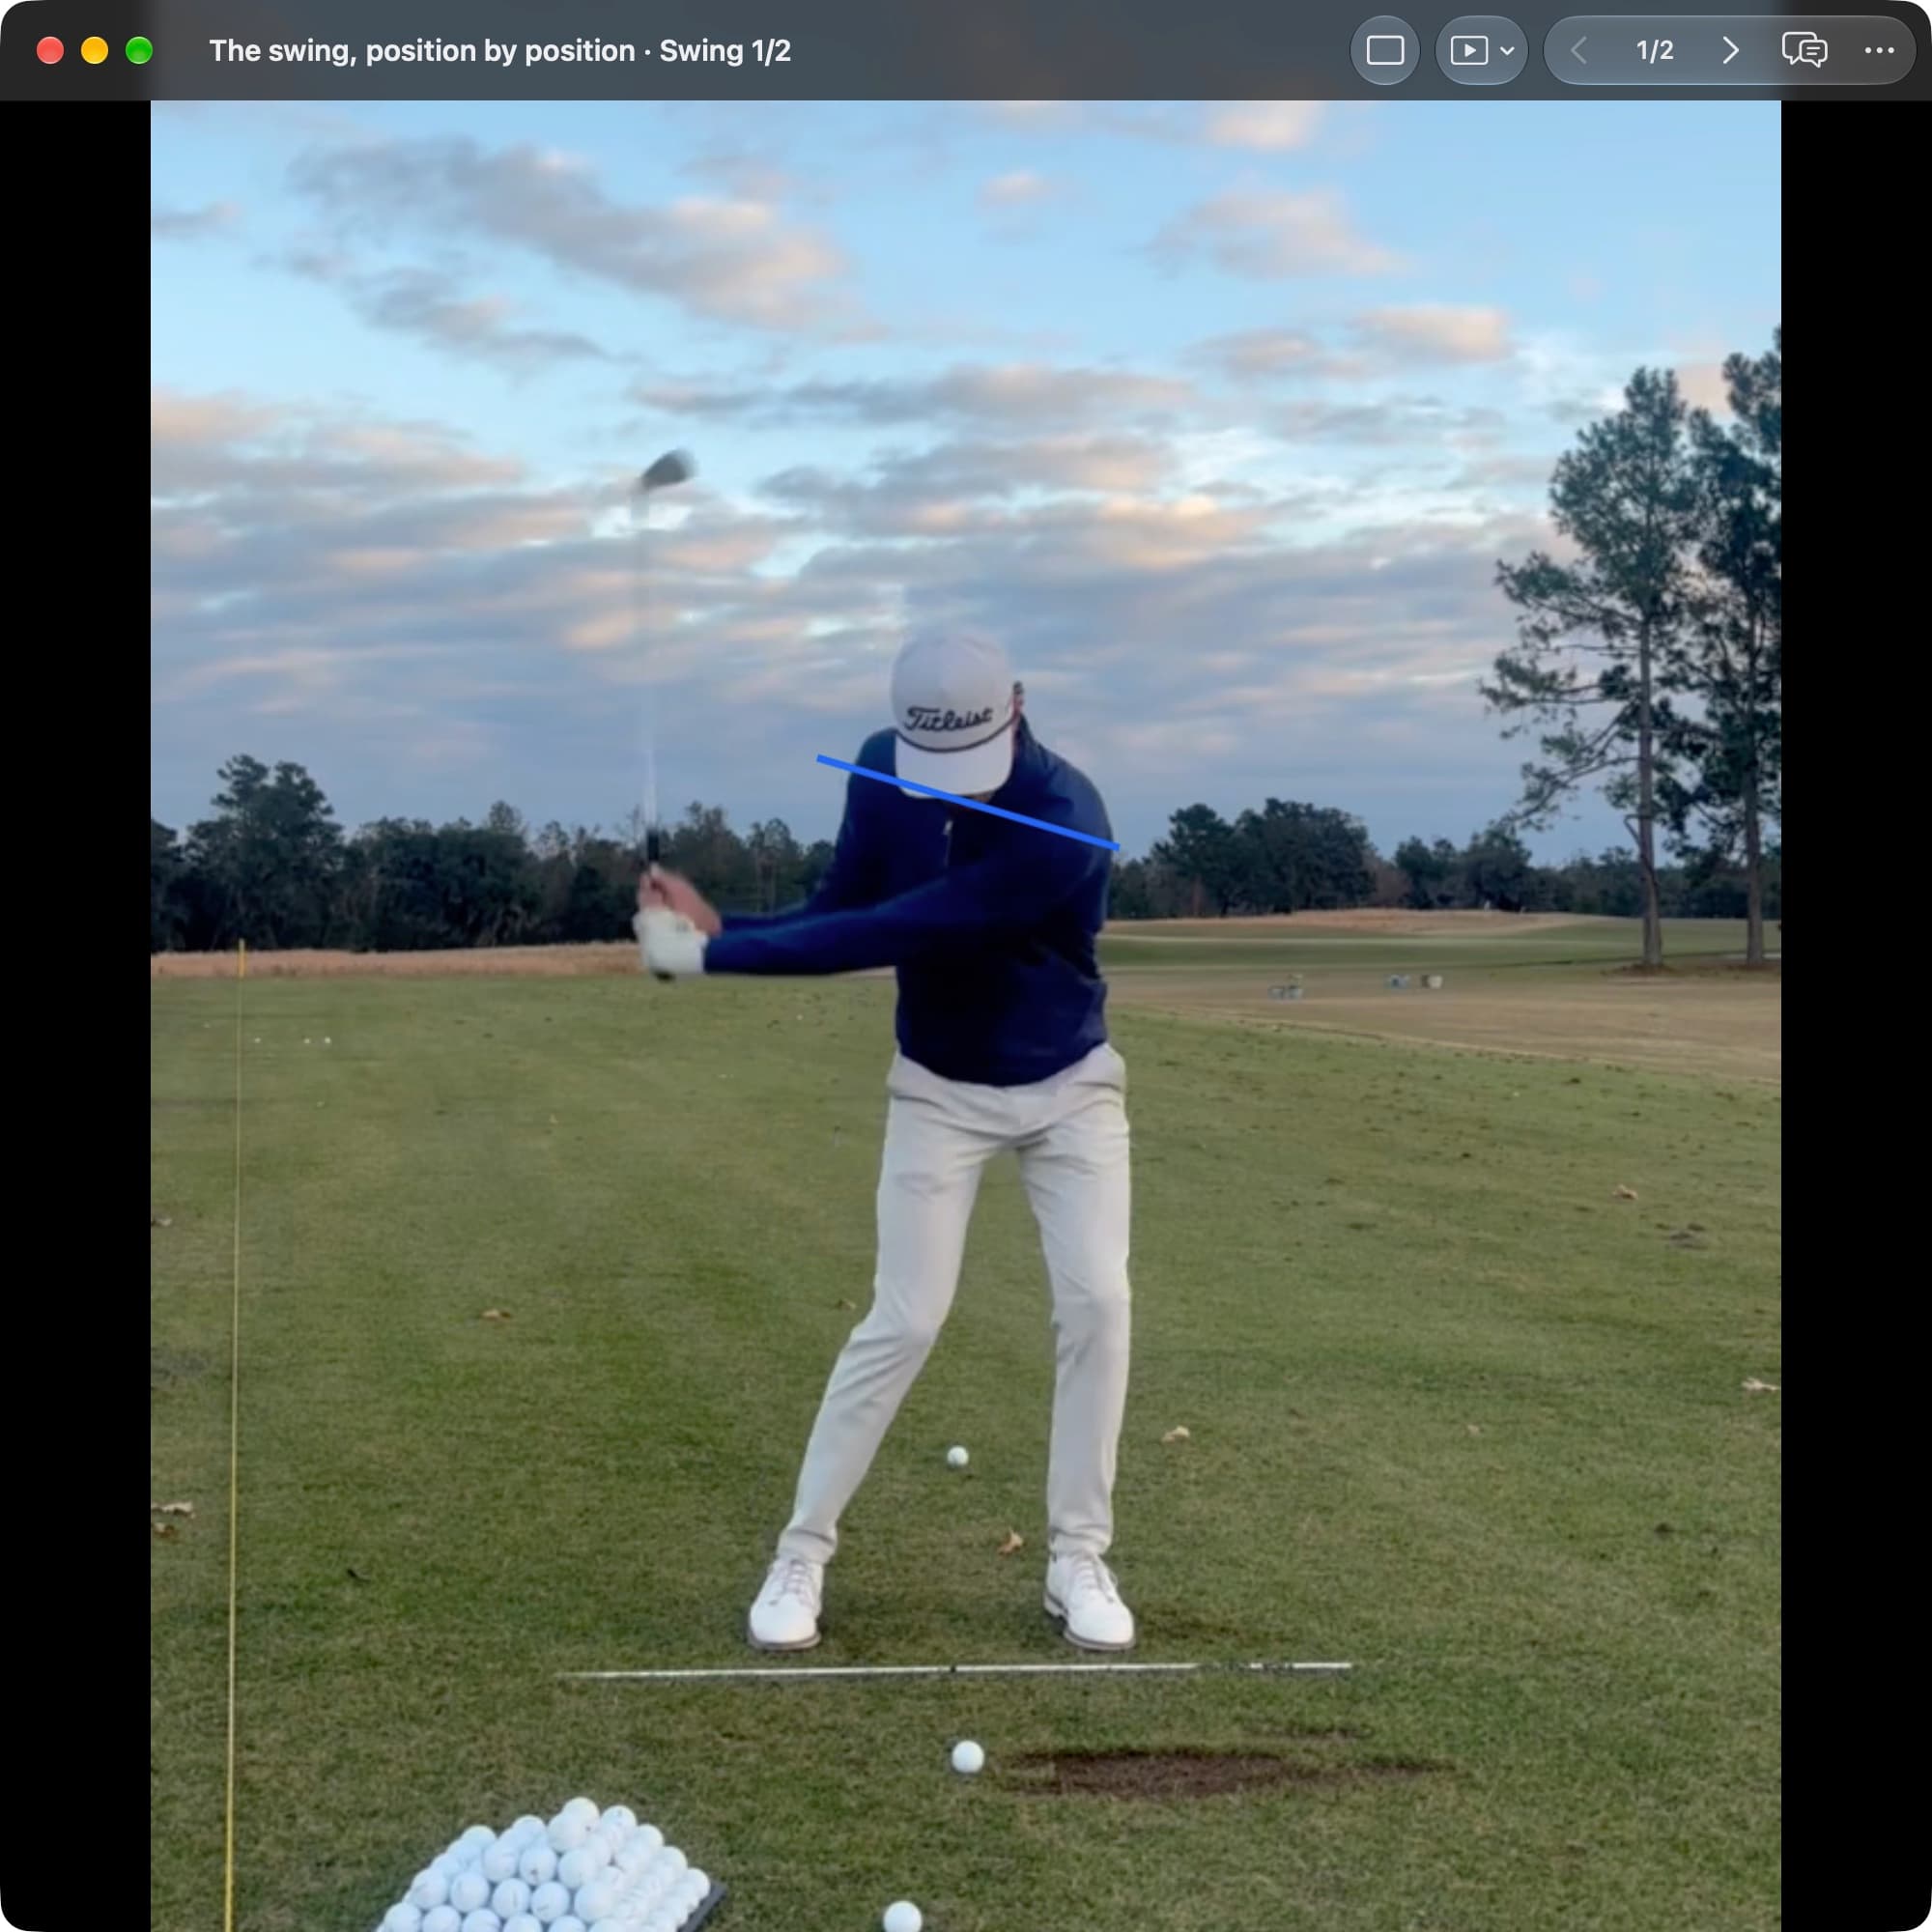
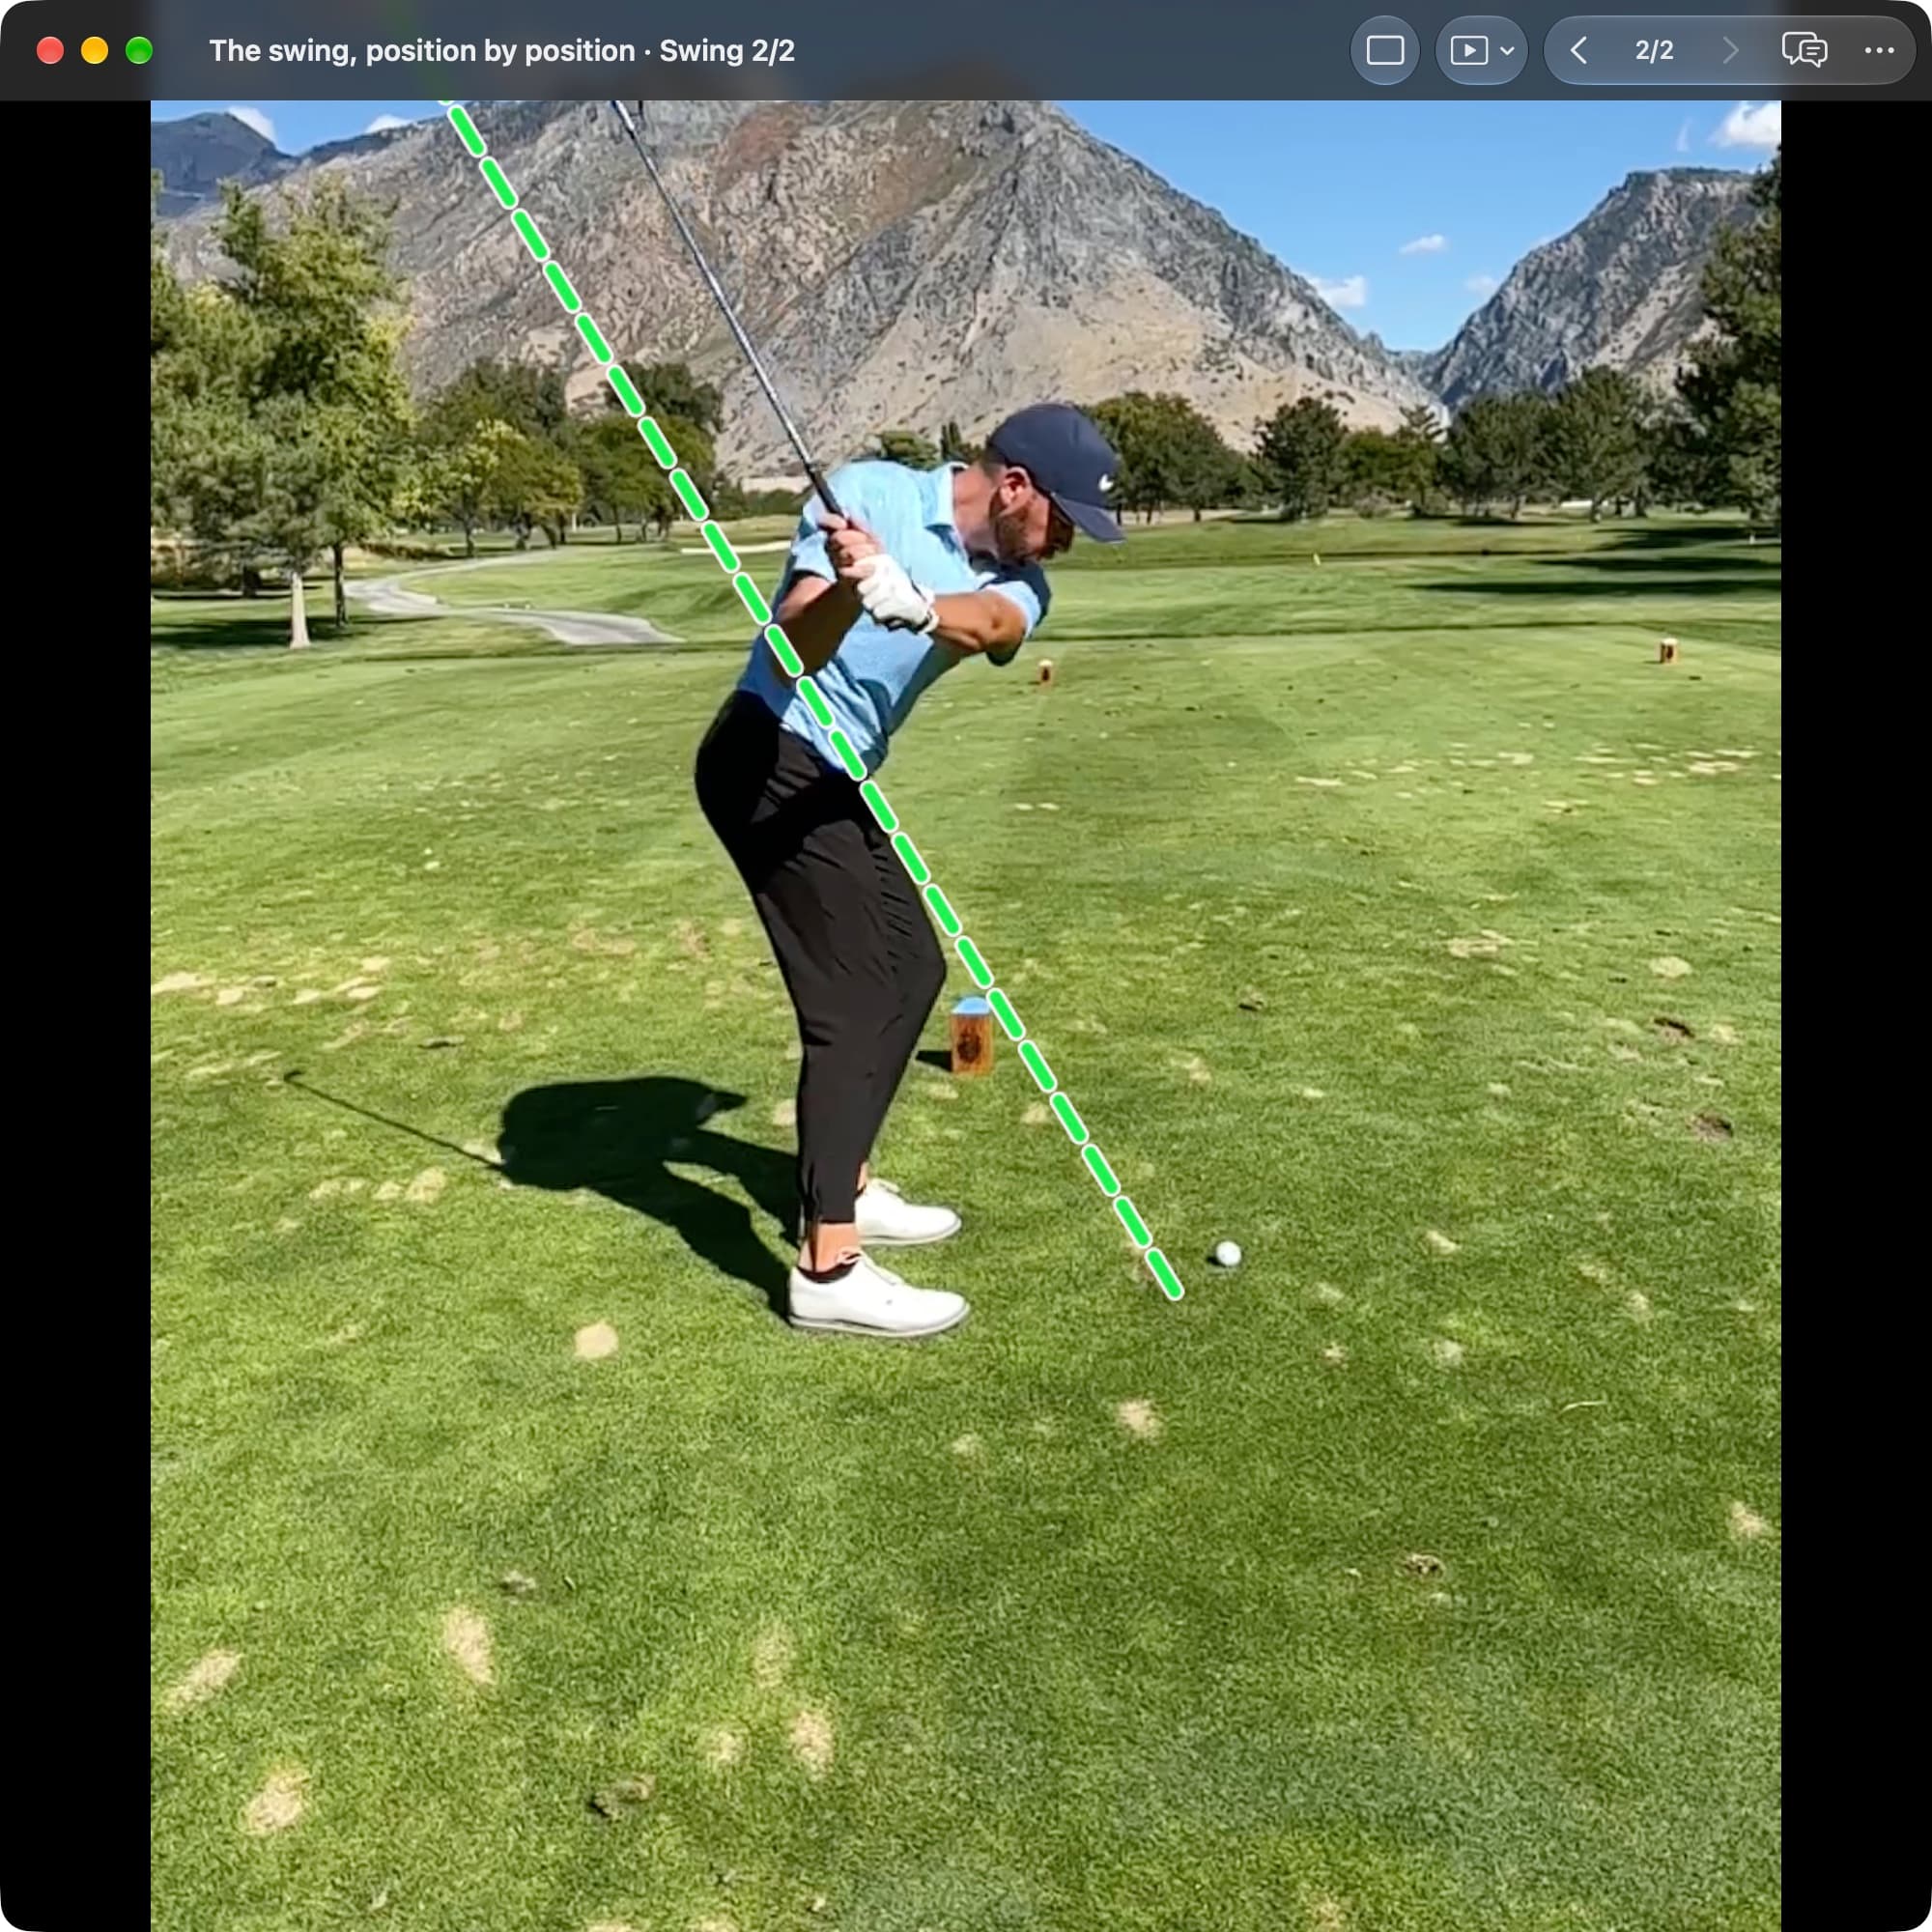
In the downswing the club is returning toward the hitting area. Face-on shows how the body has turned; down-the-line compares the club's route with its Address reference.
Face-on

Down-the-line
A downswing is useful when the club has room to reach the ball on a repeatable route. Judge it with the contact and the frames around it, not by one line on the screen.
Try this view with your own swing
- Choose the frame. Open the swing in Video Player and use Jump to position to select Downswing. Step a frame either way to see the motion around it.
- Add a reference. In AI Overlays, turn on Address Plane (in the shaft overlays) in a down-the-line recording, or the Live Shoulder Tilt Line in a face-on recording.
- Follow it into contact. Step on through Pre-Impact and Impact and compare the route with the contact you actually made.
Understanding this position.
The club is accelerating toward impact while the body turns and changes orientation. The hands travel down and around, the shaft changes its relationship to the arms, and the golfer continues interacting with the ground. This is a moving sequence, not a position to hold.
A face-on view helps show the handle-and-clubhead relationship and lateral movement. Down-the-line helps show the approach around the body and space toward the ball. Compare the selected Downswing still with Transition and Pre-Impact so an ordinary part of the arc is not mistaken for an isolated fault.
How to read the position.
The downswing does not have to trace the address shaft line or sit below the backswing in every golfer. Club length, intended shape, body proportions, and camera placement affect the picture.
A shallow-looking shaft can still lead to a poor strike, and a more upright route can be functional. Do not pull the club behind the body merely to improve a line on the screen. The useful question is whether the approach supports a repeatable strike and the chosen shot.
Read each camera view.
Face-on
Observe the handle leading the clubhead as the club approaches the ball. The amount of visible separation changes rapidly and should be read across several frames.
What this view can show.
- Hands and club
- Observe the handle leading the clubhead as the club approaches the ball. The amount of visible separation changes rapidly and should be read across several frames.
- Wrist and clubface
- The club is releasing as it approaches impact. A large retained angle is not automatically better, and the wrists should not be judged without the grip and face context.
- Shaft orientation
- Follow the shaft’s direction toward the ball. Perspective can change apparent lean, especially if the camera is not square to the target line.
- Pelvis and space
- Look at how lateral movement blends with rotation. Neither keeping the pelvis behind the ball nor driving it past a fixed mark is a universal requirement.
- Chest and shoulders
- The chest turns while side bend and extension change. A moving head alone does not establish loss of posture or a problem with the strike.
- Body rotation
- The pelvis and chest may have different orientations. Their positions do not reveal the exact order or magnitude of their speed peaks.
- Feet and balance
- Foot movement gives visible context for balance. A raised trail heel does not quantify lead-side pressure, and a grounded heel does not prove hanging back.
Video shows foot movement and balance, not pressure distribution or ground-reaction force.
Down-the-line
Check whether the hands and club have room to approach the ball. A club partly hidden behind the torso needs the following frames before being called trapped.
What this view can show.
- Hands and club
- Check whether the hands and club have room to approach the ball. A club partly hidden behind the torso needs the following frames before being called trapped.
- Wrist and clubface
- The face may be too small or blurred to judge. Keep that limitation separate from any observation about the shaft’s route.
- Shaft orientation
- Compare the approach with the intended shot and adjacent frames. A line drawn on the screen is a reference, not a direct measurement of club path.
- Pelvis and space
- Observe whether the pelvis moves toward the ball enough to crowd delivery. Allow for the changing outline created by normal rotation.
- Chest and shoulders
- Watch the torso’s orientation in relation to the club. Normal extension can occur before impact; freezing the address bend is not the goal.
- Body rotation
- The chest and pelvis continue turning through. A difference between them is descriptive rather than a required separation to preserve.
- Feet and balance
- Watch for stumbling, reaching, or an obvious loss of balance. Exact force direction and pressure under either foot remain outside the information this view provides.
Video shows foot movement and balance, not pressure distribution or ground-reaction force.
Continue through contact and observe the ball's start, curve, and strike location where available. A useful downswing delivers the chosen shot more consistently, not merely a preferred shaft picture.
For comparisons, use the same club, camera placement, and effort level. A slow drill swing can clarify a movement but should not be treated as proof that the change transfers to an ordinary shot. Include several attempts before deciding the new route is more reliable.
Watch these clips.
Use these demonstrations to put the still into motion. Each video opens at the selected starting point and continues playing; the note below explains its relevance to this position.
The swing analysis connects the approach with the shot. Keep face direction and contact in the discussion rather than assuming one path suits every intended shape.
The explanation provides vocabulary for a shaft becoming steeper or shallower. Neither direction is automatically an improvement without a useful delivery.