
8 of 10
Impact.
Impact is the brief collision between club and ball. Use the image with the shot result, and do not assume a selected frame resolves every detail of the delivery.
By Dwain Kinghorn · Updated
Driver impact is judged for a teed shot, including launch and strike location. It does not have to reproduce a mid-iron’s handle position or turf contact.
Contact happens in an instant.
The collision between club and ball is shorter than the gap between frames at ordinary video frame rates. A high frame rate recording can land on contact; an ordinary one usually shows the frame just before or just after. Check the neighboring frames before reading any single still.
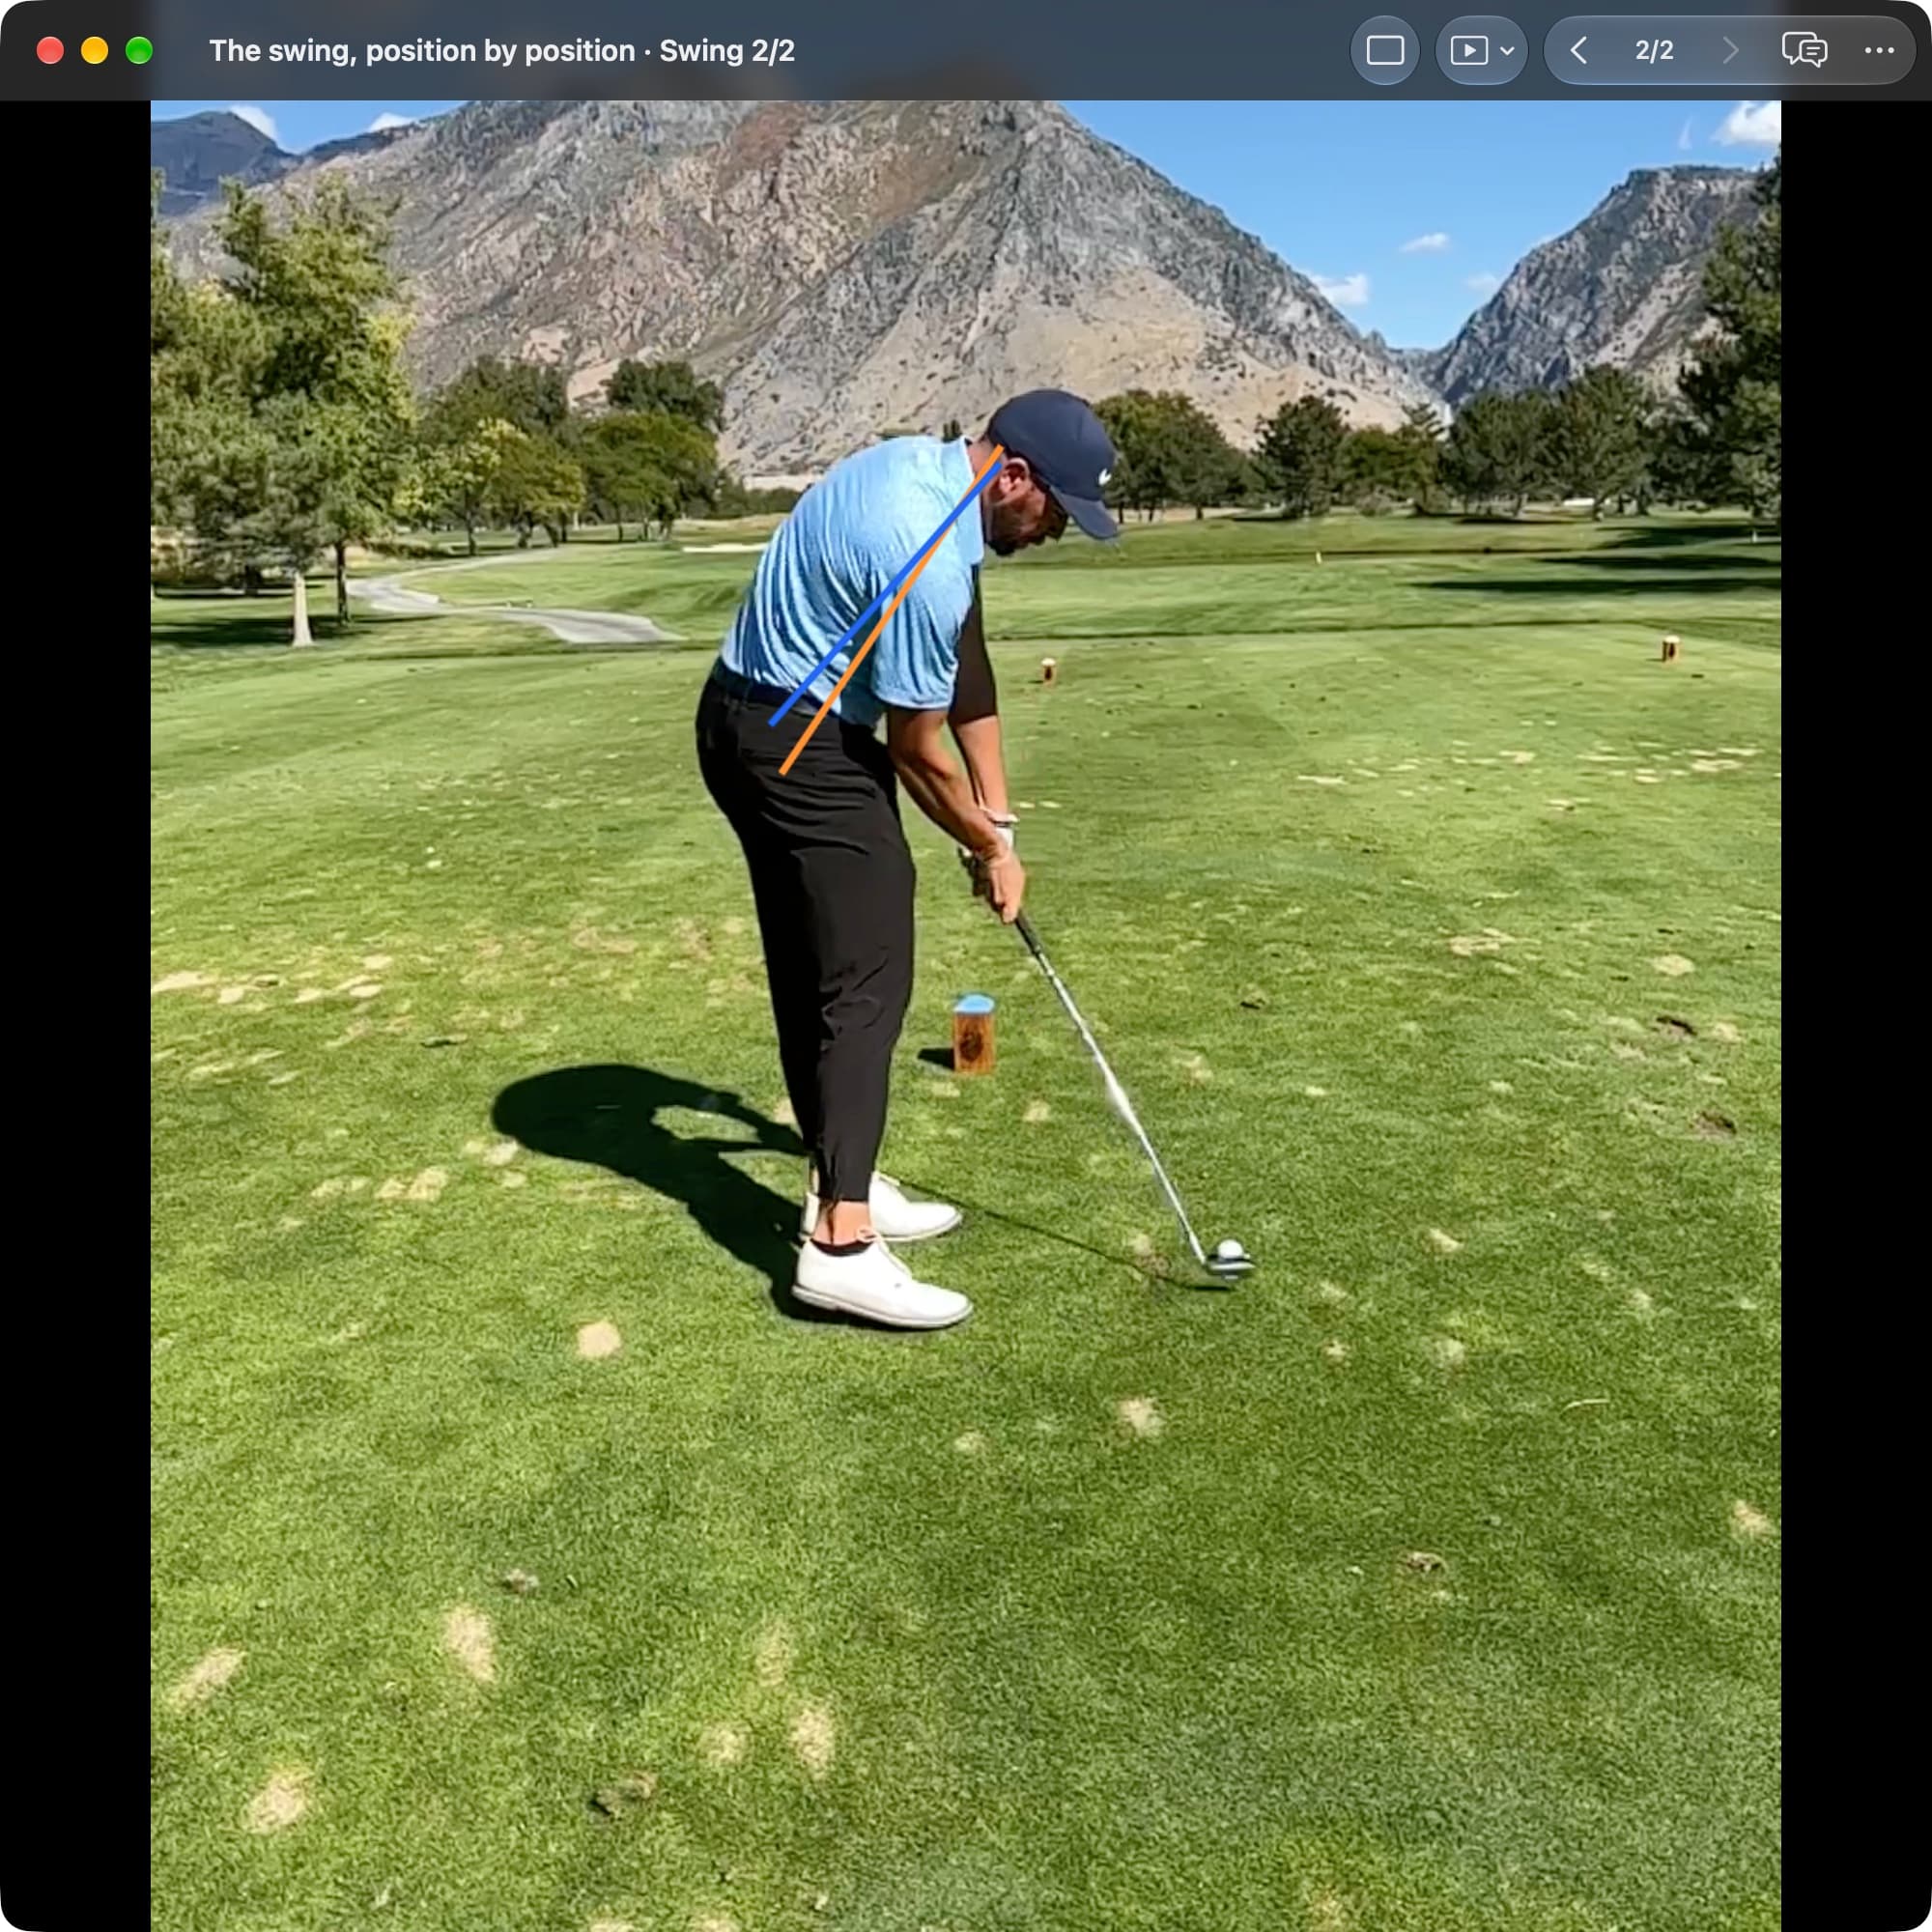
Down-the-line, at contact
Face-on, just after contact
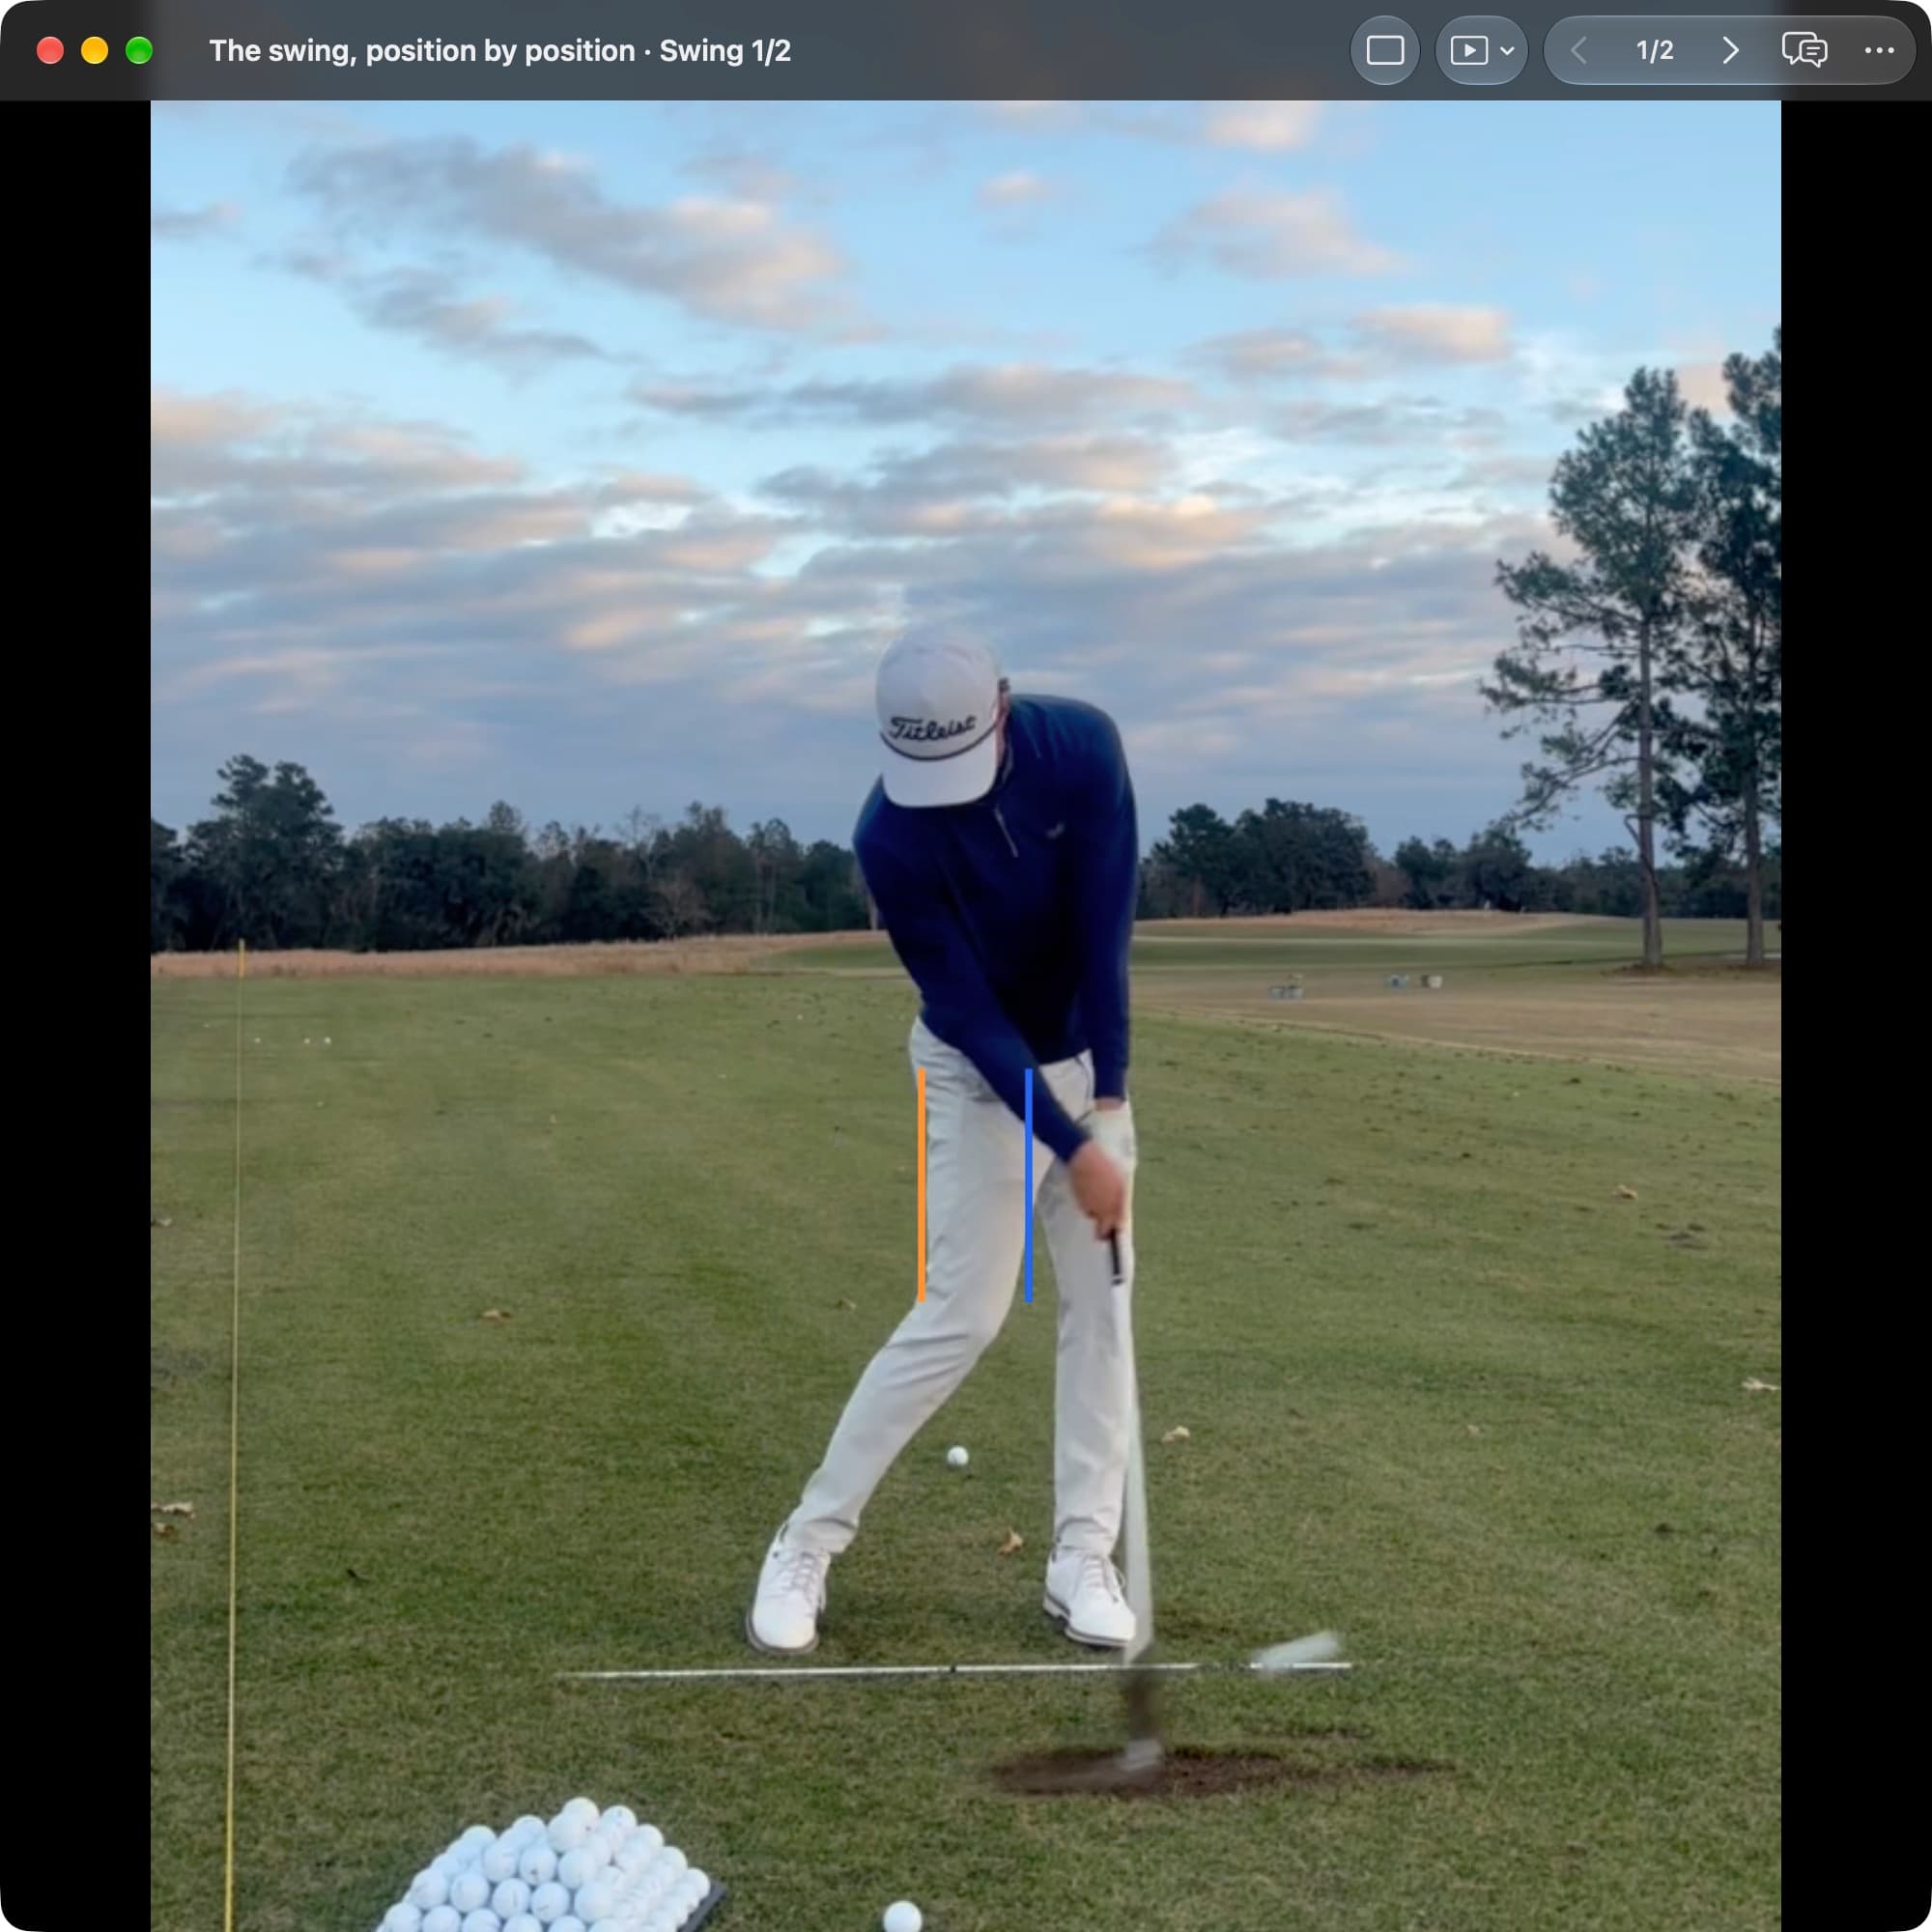
A frame near contact is still useful: it shows how the handle, shaft, and body approach and leave the ball. It cannot settle the exact face angle, path, or strike location. Read it together with the contact and ball flight.
Try this view with your own swing
- Find the closest frame. Use Jump to position to select Impact, then step one frame forward and back. Note whether the ball is still there, at the clubface, or already gone.
- Compare against Address. Turn on both the Setup and Live toggles for one reference line, or switch the panel to Posture Check to see Address and Impact side by side.
- Add the outcome. Note the contact and starting direction with the frame. Compare several ordinary swings before deciding that anything needs to change.
Understanding this position.
The ball responds to the club's speed, orientation, motion, and contact location during a very short collision. A phone camera may capture a frame just before or just after that moment rather than the collision itself. Motion blur can further limit what is readable.
For a stock mid-iron, face-on can show the handle relative to the clubhead, while down-the-line adds space and the broad approach. Neither view reliably measures exact face-to-path, attack angle, spin, or foot pressure. Use launch-monitor data where it is available and relevant, and distinguish it from visual observations.
How to read the position.
Impact is not a return to Address. The body has turned, the handle may be higher, and the torso's bends have changed. Some extension is already part of the motion.
Forward shaft lean is common on a stock iron, but more is not automatically better. Driver and specialty-shot deliveries differ. A technically unusual impact picture can also produce a repeatable result, so avoid judging the image without the club, intended flight, and actual strike.
Read each camera view.
Face-on
With a stock mid-iron, the handle often leads the clubhead. Check whether the frame is truly at contact before interpreting the amount of lead.
What this view can show.
- Hands and club
- With a stock mid-iron, the handle often leads the clubhead. Check whether the frame is truly at contact before interpreting the amount of lead.
- Wrist and clubface
- The wrists and face are moving rapidly. A clear grip and shaft provide context, but a blurry face cannot establish its exact direction.
- Shaft orientation
- Forward lean can accompany an iron delivery, but the camera’s position affects its appearance. Do not chase a larger angle without a useful shot outcome.
- Pelvis and space
- The pelvis is commonly more open than at address. The amount of turn varies; its location relative to the ball is not a universal slide test.
- Chest and shoulders
- The chest has changed orientation and may retain tilt away from the target. Do not require the head or sternum to be ahead of the ball.
- Body rotation
- The chest and pelvis can be open by different amounts. A single image cannot establish their speeds or whether the sequence was efficient.
- Feet and balance
- The trail heel may be raised or remain lower. Neither picture measures pressure beneath the feet or proves a particular weight-transfer pattern.
Video shows foot movement and balance, not pressure distribution or ground-reaction force.
Down-the-line
Look at the space available for the handle and club through the strike. The hands need not return to their exact address height or line.
What this view can show.
- Hands and club
- Look at the space available for the handle and club through the strike. The hands need not return to their exact address height or line.
- Wrist and clubface
- Face direction is difficult to judge from this oblique angle. The ball’s starting line and measured face data are better evidence when available.
- Shaft orientation
- The shaft can arrive on a different inclination from Address. A drawn reference line is not a requirement that the club must trace.
- Pelvis and space
- Compare pelvis depth with Address while allowing for rotation. A move toward the ball is relevant when it crowds the delivery, not merely because the outline changed.
- Chest and shoulders
- Observe forward bend and height as part of the turning motion. Normal extension should not be confused with a command to stay down.
- Body rotation
- The torso and pelvis continue turning through the strike. The desired relationship depends on the shot and cannot be reduced to one frozen gap.
- Feet and balance
- Look for obvious loss of balance. The image cannot quantify force through the ground or show whether pressure is concentrated under a particular part of the foot.
Video shows foot movement and balance, not pressure distribution or ground-reaction force.
Connect the frame with contact location, starting direction, curve, and the intended shot. An attractive impact image with unreliable contact is not a complete success; a repeatable useful shot deserves attention even if the pose differs from a model.
Compare several swings and inspect the adjacent frames. If contact itself is not resolved, describe the visible approach and exit rather than making a precise claim about the collision. Preserve that distinction when sharing the recording for feedback.
Watch these clips.
Use these demonstrations to put the still into motion. Each video opens at the selected starting point and continues playing; the note below explains its relevance to this position.
The down-the-line comparison makes pelvis movement toward the ball easier to see. Use Address as a reference while allowing for normal rotation.
The strike discussion highlights contact location as part of impact quality. A useful body picture does not guarantee that the ball met the center of the face.